Author Archives: Lure Parts Online

How to Put a Rattle Chamber in a Swimbait

How to Put a Rattle Chamber in a Swimbait

How to put a rattle chamber in a swimbait

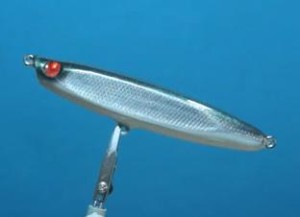
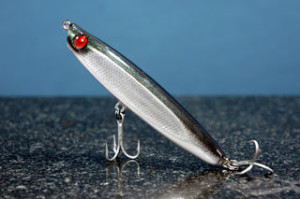
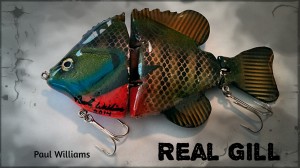
Swimbait With a Rattle, created by Paul Williams

Do you make your own swimbaits or other types of hard baits?

Have you ever wondered how to put a rattle chamber in a swimbait, but couldn’t quite figure it out?

Well, this is your day! We have a great video tutorial here from Swimbait maker Paul Williams, from Florida.

Paul was generous enough to take the time to put this video together and to demonstrate the entire process, showing us how he adds a rattle to his homemade swimbaits.

Paul starts right from the beginning of the process, beginning with figuring out the best location for the rattle chamber, installing it in a way that won’t interfere with any of the lure’s internal hardware or its ability to swim true and float upright..

One of the interesting parts of this tutorial is where Paul shows how to make the metal covers for the rattle chamber, using materials that would normally be tossed into your trash can or a recycle bin.
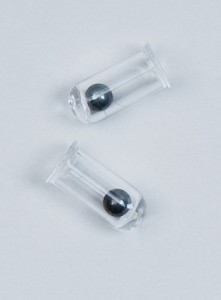
Glass Jig RattlePaul demonstrates live on camera how to mark your bait and then drill the necessary holes for inserting the rattles. And then he discusses the different types of materials that work well (or not so well) to use for the actual rattles.

Next, he demonstrates how to seal the rattle chamber, to prevent moisture from getting into the rattle chamber. And this method works for both, wood and plastic resin baits.

As Paul walks through the process, he gives some great tips on how to apply these methods to other baits, as well as some great insights from his own experiences.

He even gives a great tip for adding rattles to smaller baits, by using a Lure Parts Online Glass Jig Rattle, pictured above in this blog post.

So grab something to take notes with, sit back, and enjoy the video, as you learn something new from an experienced swimbait maker.

List of Materials Needed

1 – Assembled Swimbait or other solid body hardbait
2 – metal or brass shot or BBs
3 – Various drill bits (Paul gives types and sizes in the video)
4 – liquid sealer
5 – 5 minute Epoxy
6 – Small applicator/paint brush or toothpick
7 – Auto body filler (bondo or similar)

If you’d like to view some of Paul’s finished swimbaits, be sure to visit his Facebook page: Paul Williams Custom Lures

And, as always, if you enjoyed this tutorial, please be sure to share it with others!

Choosing The Right Blades For Your Spinnerbait

Choosing The Right Blades for Your Spinnerbait

Choosing the right blades for your spinnerbait

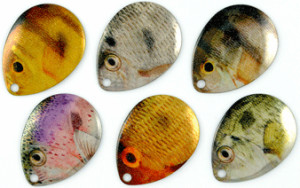
TrueImage Flashback Colorado Blades

When it comes to choosing the right blades for your spinnerbait, it can sometimes seem overwhelming.

There are hundreds of different sizes and styles available. When you throw all of the various colors and finishes into the mix, now you’re talking about thousands of possibilities!

Spinnerbaits are one of the most versatile baits that you can make when it comes to catching bass and a multitude of other species. And nobody can argue with the fact that you could throw just about any blades on a spinnerbait and it will catch some fish.

But how do you squeeze the most potential out of your spinnerbait? How do you make it the most effective it can be for specific conditions? It pays big dividends to take the time to understand how different blades can change the way your bait behaves and attracts fish.

Beast Tame Spinnerbait with over-sized blade

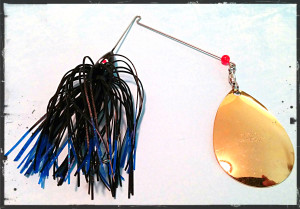
Beast Tamer Spinnerbait with over-sized blade

Different styles and blade shapes create different levels of vibration and flash under the water. This can increase or decrease the ability of a fish to find your lure. And all of this is based on water clarity, light conditions, water depth and a host of other factors.

Spinnerbait blade colors and finishes will also change how well a spinnerbait can be seen. Nickel, gold, copper and brass are some of the most popular finishes and they’ve been around long enough to be proven fish catchers.

Painted blades and blades with photographic finishes have emerged onto the market in recent years. They’ve made a pretty big splash in the marketplace, no pun intended. These blades allow the angler to add color or realism to their bait. This sets them apart from the ordinary spinnerbaits fished by the vast majority of anglers.

Sometimes a simple change in blade color can make all the difference in the world and change a slow outing into one that you’ll remember for years to come. Different colors will offer better visibility in varying water clarity.

spinner blade assortment

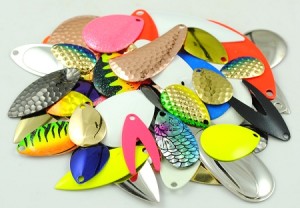
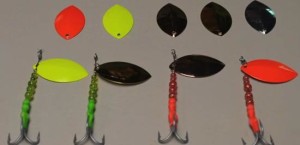
Spinner blade assortments are a good way to make sure you have plenty of blades to choose from

And then you throw all of the different styles and shapes into the mix. You have Colorado blades, willow leaf blades, Indiana blades, chopper blades, magnum willow blades, serrated willow blades, royal blades, whiptail blades, doc shelton blades and many others. Are you thoroughly confused and bewildered yet?

So how do you take this vast selection and make sense of it? How do you know which blade shape and color will work best on your favorite lake under which conditions? How do you take all of this and digest it and make informed decisions when choosing the right blades for your spinnerbait?

That’s a great question! And it’s one that we’re going to answer for you, right here, right now. We found an awesome video that was put together by tournament angler and pro guide, Curt Snow, that explains the various factors to take into consideration and helps you understand spinnerbait blade selection much better.

Curt explains how blade shape affects the vibration of your bait, as well as the depth a bait will run with the various blade styles. He also discusses water clarity and which blade style and color works best under specific conditions.

So grab a notebook and pencil and enjoy the video, as you get over 20 years worth of angling knowledge packed into one 15 minute video.

To check out our huge selection of spinner blades, Click Here
For our premium quality spinnerbait heads, Click Here
For a selection of top-quality spinnerbait hardware, Click Here

And, as always, if you enjoyed this article, please be sure to share it with others!
 

How to Make a Fishing Lure From a Wooden Paint Brush Handle

How to Make a Fishing Lure From a Wooden Paint Brush Handle

How to Make a Fishing Lure From a Wooden Paint Brush Handle

Making a lure from a paint brush handle – A work in progress

It’s no secret that fishing lures can be made from a variety of materials. Wood, plastic, & metal are just a few on the list. And within each of those materials, there is a list of sub-materials, if you will, that can be used.

There’s poly resin, soft plastic, PVC to start the plastic material list.

For wood, there’s balsa, pine, cedar, jelutong and a host of other types of tree-based materials.

When it comes to metal materials for lure making, there’s brass, copper, stainless steel, aluminum and many others.

So you can see that the list of possibilities when it comes to what to make a fishing lure from is pretty unlimited. It is, in fact, limited only by your imagination.

In this month’s blog post we’re going to show you how to make a wood lure from a regular, everyday 1 1/2 – 2 inch wooden paintbrush handle. Doing this will save you a ton of time when it comes to carving and shaping the lure body, since a large portion of the work has already been done at the paintbrush factory.

Creating and assembling this lure will require only some basic tools, which we’ll cover in the actual tutorial. We will also give you a link to a list of those tools at the end of this article, so you’ll know ahead of time exactly what tools you’ll need.

We will also be showing you how to foil your lure for a more natural, realistic look that will reflect light and catch the attention of the fish you’re after. Foiling sounds hard to a lot of people, but Paul Adams shows exactly how it’s done in the video below.

One of the cool things about using this method is that you don’t need a lathe to shape the lure and the amount of hand-shaping and sanding that’s needed is minimal. This saves you a lot of time and work, so you can focus more on the finish work and get out fishing with it more quickly 🙂

Finished paint brush handle fishing lure

Finished paint brush handle fishing lure

The end result is a lure that sinks and can be worked at just about any depth, making it a very versatile lure for many species of fish. Once you’ve made your first one of these you can experiment with the weighting on any subsequent lures of this type that you make, to achieve different sink rates.

Don’t be afraid to use your imagination once you’ve gotten this lure-making method down. A few little tweaks here and there can give you very different results when it comes to the action of this lure.

In the video tutorial below, you’ll learn how to cut the handle off of the paint brush at the proper angle, mark the “lure body” for drilling and weighting, insert weights, screw eyes and other hardware, sand the body slightly and then prep it for foiling.

Paul will walk you through the foiling process, step by step, and then on to painting your lure and getting it ready to fish with.

So check your cupboards or closets and see if you might have an old wooden paint brush laying around that’s no longer of use. You might just be able to recycle it and make a great fishing lure from it!

Enjoy the video 🙂

List of Tools and Materials Needed – Click Here

Make Trolling Spinners for Salmon and Steelhead

Learn How to Make Trolling Spinners for Salmon and Steelhead!

How to make trolling spinners for salmon and steelhead

How to make trolling spinners for salmon and steelhead

In our latest post we’ll be showing you how to make your own trolling spinners for Salmon and Steelhead, for about $2 each.

It’s a pretty-well-known fact that making your own lures, no matter what type or style, is a great way to save money, as well as allowing you to customize your lures to be exactly what you want them to be, instead of having to settle for factory-made fare. The combination of components and color choices is endless, allowing you to tweak your bait in just about every aspect.

Inline spinners are no exception. Whether you make them to cast for trout in streams, rivers and lakes, or to troll in big waters for salmon and steelhead, the same holds true. Buying the components individually and assembling them yourself is not only fun, but you also get the satisfaction of knowing you’re catching fish on lures you made with your own hands 🙂

As with our previous post, we will be making on inline spinner. But this one will be a bit different than the last one in the fact that this spinner will be used for trolling, instead of casting.

How to make trolling spinners for salmon and steelhead

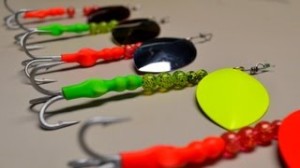
How to make trolling spinners for salmon and steelhead

This type of spinner will look somewhat similar in its design, but will require some different components to make it more rugged, for the bigger fish it will be catching. Also, because it’s trolled and not being cast, it will be assembled a bit differently.

Big Salmon and Steelhead can be brutes and you want to make sure you build spinners that will be up to the task, not bending or breaking while under the pressure of a massive fish, as it surges or jumps.

As with the last post, we will be including a tutorial video at the end, to show you the exact steps needed to build these spinners with the least amount of difficulty. Tyler walks you through a few new tips that make it easier than if you were trying to figure it out yourself.

Oh, and in addition to a list of the necessary parts, we will also be giving you a list of the tools needed to make these lures. This way you’re equipped with everything you need before you sit down and start putting them together.

Tyler does a great job of letting you know which colors work best for him, but keep in mind that you can adjust the colors for your own lures and test some new color schemes, based on your own personal preferences or the water conditions where you live 🙂

Here are the individual part numbers and links to each part, for your convenience:

Tools needed:
Needle Nose Pliers – narrow nose is preferred
Split Ring Pliers – Item #4151
Scissors (for cutting the surgical tubing)
Small bowl of water
Liquid Dish Soap (to be used as a lubricant for sliding the tubing over some of the other lure components)

If you’d like to visit Tyler’s YouTube channel, you can do so here: Frugal Fisherman

Make Your Own Inline Spinners

French Spinner Blades

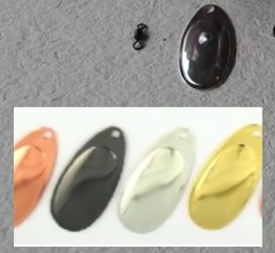
French Spinner Blades

Make your own inline spinners.

Inline spinners have been around for a very long time and they have caught millions of fish covering hundreds, or maybe even thousands, of different species across the globe.

It’s safe to say that they are a fishing staple for many different species pursued by anglers worldwide.

The reason for their wild popularity is that in-line spinners just plain catch fish. And even better is the fact that they’re not hard to use. Cast it out, reel it in. It’s that easy! Of course you can vary retrieve speeds, etc., to try to trigger bites from lethargic fish, but day in and day out, that’s not necessary to get fish to bite on inline spinners.

Inline spinners range in size from very tiny, for small panfish and trout, to extra-heavy-duty for monster northern pike and musky. They have been responsible for some serious trophy fish over the decades.

Some really nice spinners can be bought at retail stores across the globe, as well as a slew of online tackle retailers. They can range from very basic, to extremely customized with regard to the look of them. Most are reasonably priced, but when you start getting into the heavy duty spinners for pike and musky, they can get expensive in a hurry.

Homemade Inline Spinner

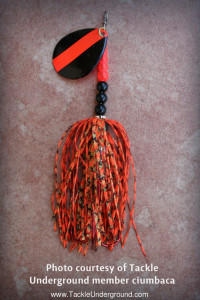
Medium Inline Spinner – Created by Tackle Underground member ciumbaca

This is where wanting to make your own inline spinners comes into play, to save you a lot of money and give you the freedom and flexibility to make them exactly they way you want them.

Pictured to the left is a beautiful homemade inline spinner, created by Tackle Underground member ciumbaca.

This is just one of the many inline spinners he created and posted photos of, but it gives you a good idea of how nice homemade inline spinners can be made to look.

In addition to being able to tweak the colors, size and other options, if you make your own inline spinners, you can also turn out some super-high-quality baits for less than you could buy them for if you bought factory goods or had someone custom-make them for you.

And, of course, you get the satisfaction of catching nice fish on lures you made, which is a major part of why people choose to make their own lures to begin with. And who doesn’t want to save money, right?

So what we’d like to do now is give you some detailed instructions, showing you how to make your own inline spinners. But instead of writing it out and requiring you to read through a lengthy article, we’ve chosen to show you how in a great tutorial video put together by Tyler, a Lure Parts Online customer who was nice enough to take the time to create the video.

In addition to showing you how to make some nice inline spinners, Tyler also shows you what it will cost, so you know right up front what’s involved regarding your budget and how much you’ll save vs. buying spinners from retail stores.

This awesome video goes into great detail when it comes to showing you exactly what parts you’ll need to purchase, including all of the part numbers. So be sure to grab a pencil and piece of paper so you can take notes and jot down ideas that you might get as you watch the video.

In case you missed any of the part numbers in the video, you can visit the Lure Parts Online website, in the inline spinner parts section, by clicking this link: Inline Spinner Parts

And here are the individual part numbers and links to each part, for your convenience:

If you’d like to visit Tyler’s YouTube channel, you can do so here: Frugal Fisherman