Author Archives: Lure Parts Online

How to Make Soft Plastic Swimbaits

How to Make Soft Plastic Swimbaits

How to Make soft plastic swimbaitsIf you fish with swimbaits, you should learn how to make soft plastic swimbaits yourself.

As with making any kind of lure yourself, if you learn how to make your own soft plastic swimbaits, it will save you money and give you the opportunity to make baits that are exactly what you want. You will no longer be limited to what’s available from retailers.

Additionally, you will be able to custom create colors that you can’t buy. This comes in handy when you want to “match the hatch” on a specific lake and, and duplicate the look of a certain type of baitfish.  Many times this will trigger bites that you would not otherwise be able to get.

Many people begin pouring their own soft plastic lures as a hobby, but it quickly becomes an obsession! It can be addictive once you get started 🙂

For today, we’re going to focus on how to make soft plastic swimbaits, so let’s get back to that topic!

The video below is a great tutorial, showing just about everything you’ll need to know to make these baits successfully.

The video creator is using the 3.5 inch Ripper swimbait mold, which is part of the Do-It Essentials Mold  series. This is a great mold. It’s high quality, and it just plain works!

When you click that link above, scroll down to find the 3.5 inch Ripper swimbait (Model 014). It’s an awesome swimbait that flat out catches fish.

Unlike the mold used by the video creator, the mold we linked to above is a 3-cavity mold, which will speed things up considerably when it comes to pouring larger numbers of swimbaits in a short time.

Also, below the video we have listed all of the items you’ll need to pour your own soft plastics, including some of the basic equipment and safety equipment as well.

As with anything, be sure to wear the necessary safety gear, to prevent getting burned or breathing in large amounts of fumes when pouring soft plastic baits. Safety always comes first!

So, now that we’ve got all of that out of the way, give the video below a watch and be sure to take note for later. We promise that you will want to do this after watching!

Items used for this project:

If you enjoyed this post, please be sure to like it and share it with your friends.

If you’d like to learn how to tie your own bucktail jigs, click here.

And, as always, if you need any kind of lure-making supplies, be sure to visit our website, at http://lurepartsonline.com

How to Tie a Silicone Finesse Jig

How to Tie a Silicone Finesse Jig

Learning how to tie a silicone finesse jig can be a bit tricky if you’re new to this method of tying. It’s not necessarily difficult to do. But there are a few little tips and tricks that can make it much easier to do, especially for the neophyte.

Our video below will show you all of the steps involved. And by the time you’re finished watching, you’ll know how to tie a silicone finesse jig with no problems at all. You may not be a pro, necessarily, but you’ll be well on your way to doing it easily.

Tying your own jigs will give you the benefit of being able to create them exactly the way you want them to look. So you ‘re not limited to the selection available from a retail store.

Finesse jigs excel for bass when the conditions are tough, especially after a cold front or when the water is extremely cold. The smaller profile will be more likely to get bit when bulkier lures get ignored. Keep this in mind when you’re fishing under tough conditions.

We have listed everything you need at the end of this post, but just to give you a heads up, you’ll be needing a fly tying vice, a small bass jig, some silicone skirt tabs and some fly tying thread.

Smalljaw, the creator of the tutorial video, goes into some good detail with what he likes to use for skirt material, thread and glue. And since he’s been at this for quite a while, we can take his advice as being solid, not just theory.

Choose Your Colors Carefully

How to Tie a Silicone FInesse JigTying the jig in the video requires only two colors, so you won’t need a huge selection of silicone skirt tabs. But choose your colors carefully. The idea with a finesses jig is usually to create something very natural looking.

But don’t be afraid to experiment a bit. Sometimes a specific lake will call for an odd color combination that most people wouldn’t even think of using. And if you can find that color combination, you will catch fish that most people will miss out on.

Check out the video tutorial below and then get yourself busy tying some custom silicone finesse jigs. The next time the bite gets tough, you’ll be glad you did!

Items used for this project:

If you enjoyed this post, please be sure to like it and share it with your friends.

If you’d like to learn how to make spinnerbaits for bass, click here.

And, as always, if you need any kind of lure-making supplies, be sure to visit our website, at http://lurepartsonline.com

How to Pour Lead Head Jigs

How to Pour Lead Head JigsHow to Pour Lead Head Jigs

Want to learn how to pour lead head jigs? We’ve got a great tutorial for you!

Pouring your own lead head jigs is easy, fun and will save you a ton of money when compared to buying jigs at the store.

And when you pour your own lead head jigs, you can make them in the styles, sizes and color combinations that you prefer.

So where do we start?

First, you’ll need to decide what style lead head jig you want to make. There are dozens of choices, ranging from ball head to minnow head to pony head and everything in between.

The video in this blog post is using a mold for shad head jigs, which are typically used for bigger fish, such as striped bass. But the sky is the limit, so choose whatever works for you!

Once you’ve chosen your jig head style, you’ll need to pick up a good mold to pour them with. You’ll also need a good lead melting pot to heat the lead with.

And to finish it off, you’ll need a good jig hook that matches the mold you’re using.

Time to Pour The Jigs

Now that you’ve got everything you need with regard to components, it’s time to start pouring.

So, you’ll need to grab your mold, your hooks and some lead ingots and set about the business of making jig heads!

If you’re not familiar with pouring your own lead, the video below has some great tips. There are practical things that you’ll learn from the video. There are also some very good safety tips you should pay close attention to.

For example, be sure to use extreme caution when it comes to handling hot lead and a hot mold. Leather gloves are necessary in order to prevent burns to your hands. You’ll also want to protect your eyes when pouring hot lead.

After the jig heads have been poured, they only take a few seconds to harden. So go ahead and open your mold up and remove the new jig heads and remove them from the mold. Continue to pour until you have the desired number of jig heads.

Now It’s Time to Paint!

Painting your new jig heads with powder paint is extremely easy to do. You can choose to paint directly from the container that the powder paint comes in. Or you can use a fluid bed, which causes the powder paint to stay light and fluffy. This gives you a more even coat when dipping hot jigs in it.

Use a candle or a heat gun to heat your new lead head jigs before dipping them in the powder paint. Word of warning; DO NOT use a propane torch to heat your jig heads. Doing so will most likely result in your jig heads melting and being rendered useless.

After you’ve painted a bunch of heads, be sure to put them in an oven, or a toaster oven, to cure the paint and keep it hard. This will give the paint a rock-hard finish that will resist chipping when bouncing it off rocks, etc.

Put on The Final Touches

3D eyesNow that the jig head is poured and the paint is cured, it’s time to put the eyes on!

Good 3D eyes will add a realistic touch to your jig heads that can get finicky fish to bite, when they might not otherwise give your lure a second glance.

These types of eyes simply peel off a sheet and stick to your lure. Plain and simple.

To keep them in place, use some good top coat to seal everything and give the entire bait a tough finish that will take a beating from big fish and rocky cover.

This will also keep the eyes in place for the life of the jig head.

So there you have it. How to pour lead head jigs in a few simple steps!

We hope you have learned enough from this post about how to pour lead head jigs to get you comfortable with it.

Be sure to give the video below a watch. It’s well done and should get you well on your way to pouring your own lead head jigs in no time at all.

Items used for this project:

If you enjoyed this post, please be sure to like it and share it with your friends.

If you’d like to learn how to make spinnerbaits for bass, click here.

And, as always, if you need any kind of lure-making supplies, be sure to visit our website, at http://lurepartsonline.com

How To Build a Double Cowgirl Musky Inline Spinner

How To Build a Double Cowgirl Musky Inline Spinner

How To Build a Double Cowgirl Musky Inline SpinnerIf you’re a hardcore Musky angler, you will undoubtedly want to learn How To Build a Double Cowgirl Musky Inline Spinner.
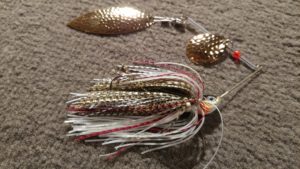
Double Cowgirl Musky Inline Spinners catch some monster fish. And building them yourself will save you a ton of cash over the years. You also get the option of making custom colors and configurations by making your own baits.

Building these spinners isn’t difficult. But sometimes it can be intimidating to get started. The video below will walk you through the entire process, from tying the skirt to assembling and finishing the bait.

You can get started by clamping a small piece of coiled wire in your vise and creating your own skirt with tinsel and thread. Creating the skirt is actually the most time-consuming part of the whole process.

Once the skirt has been tied, it’s time to start assembling the rest of the parts to build your inline musky spinner.

The Skirt is Finished. Now What?

Now we’ll take a treble hook, a wire shaft, a piece of heat shrink tubing, 2 magnum Colorado spinner blades (size 10), a solid brass lure body (approximately 3/8 oz.), clevises, hollow metal beads, a split ring and a lead egg sinker.

Now it’s time to assemble all of these items.

The first thing you’ll do is add the treble hook to the wire shaft and then secure it with a piece of heat shrink tubing.

Once the heat shrink tubing has been slid into place, heated and then allowed to cool, the rest of the process involves sliding various components onto the wire shaft to create the actual spinner assembly.

Probably the trickiest part is making sure the two clevises are installed correctly so the two blades work in conjunction with each other. So be sure to pay close attention when doing that part of the assembly!

The final step is to bend the end of the wire into a loop where your line will be tied on. This involves making a couple of bends and then twisting the wire around the wire shaft. When you’re finished with the twists, the excess wire can be trimmed off with wire cutters.

Now, go and catch a big musky!

Items used for this project:

If you enjoyed this post, please be sure to like it and share it with your friends.

If you’d like to learn how to make spinnerbaits for bass, click here.

And, as always, if you need any kind of lure-making supplies, be sure to visit our website, at http://lurepartsonline.com

How to Make a Spinnerbait

How to Make a SpinnerbaitHow to Make a Spinnerbait

Every angler who uses artificial lures should learn how to make a spinnerbait. Why? Because spinnerbaits are one of the most popular and most productive lures known to man when it comes to fish-catching capabilities.

Spinnerbaits can be fished deep or shallow. They can be fished fast, slow or any speed in between. Spinnerbaits will catch fish in a very wide range of water temperatures and under a variety of conditions.

To put it bluntly, they just plain catch fish!

Why Learn How to Make a Spinnerbait?

So why would you want to learn how to make a spinnerbait, instead of just going to the store and buying them? There are a few reasons, but the main two reasons are these;
1 – You can make endless color and blade configurations if you make your own spinnerbaits.
2 – You can make high quality spinnerbaits for much less than you can buy them in the stores.

How Hard is it to Make a Spinnerbait?

High quality spinnerbait head

High quality spinnerbait head from Lure Parts Online

It’s not hard at all. Spinnerbaits are one of the easiest lures to assemble. The trick to making great spinnerbaits is in choosing the right components. Good skirt and blade combinations will out-fish spinnerbaits that are just thrown together with little thought given to how the bait will look to the fish.

Once you understand what it takes to make a great spinnerbait, you’ll be spending a lot of time experimenting with hundreds of combinations of sizes, styles, colors and blades.

And as you do that, you’ll discover that certain color and blade combinations will work better under specific conditions. This can vary from one lake to another. Sometimes it can even vary from one hour to the next on the same lake!

So What do I need to Make My Own Spinnerbaits?

You’ll need a few different items to get started once you decide you want to learn how to make a spinnerbait.

You can start with the basics and then expand from there. The first thing you’ll need is the main part of the spinnerbait, the head/wire combination. You can either buy the wires and hooks, along with a mold, and pour the lead yourself, or you can buy pre-poured Spinnerbait heads. You can even buy them pre-painted. This saves you a lot of time and work.

You’ll also need some other hardware items, namely spinner blades, swivels, beads and clevises.

If you want to, you can also use spinnerbait spacer tubes to keep the blades from interfering with each other if you build a tandem blade bait.

And then you’ll need pre-made spinnerbait skirts or a variety of skirt materials in order to finish off your lure.

Once you have those items you can build your own spinnerbait by watching the videos below. They both result in the same type of lure, but use a couple different tricks to make assembly easier.

After making just a few spinnerbaits you’ll be able to start experimenting with different blades and skirts to see what works best for you on your favorite lake.

Items used for this project:

If you enjoyed this post, please be sure to like it and share it with your friends.

And, as always, if you need any kind of lure-making supplies, be sure to visit our website, at http://lurepartsonline.com