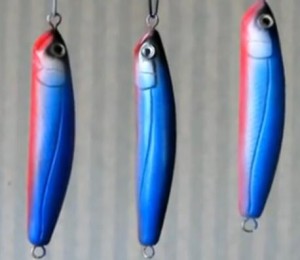
Category Archives: How to Paint Lures With an Airbrush

How to Paint a Baby Bass Pattern Crankbait

How to Paint a Baby Bass Pattern Crankbait

How to Paint a Baby Bass Pattern Crankbait

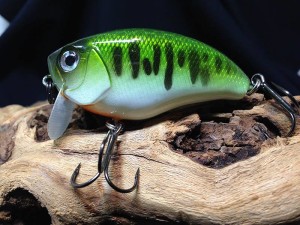
Baby Bass Pattern Crankbait

In this latest post, we’ll show you how to paint a baby bass pattern crankbait!

Michael Orensteen will be demonstrating, once again, how to take a blank, unpainted crankbait body and turn it into a custom-painted crankbait that you’ll be proud to show to your fishing buddies.

Not only will it look good in your tackle box, but it will catch fish as well as, if not better than, store-bought lures that are owned by the masses. And you’ll fish your new crankbait with confidence, knowing that you created it yourself 🙂

There are a few tricks to knowing how to paint a baby bass pattern crankbait in a realistic way, and the video below will show you everything you need to know to accomplish it with less effort than you think.

As you start, you’ll learn the importance of spraying on a good base coat, before doing anything else. This gives you a good foundation to work from and saves you a lot of time and extra paint when applying the other colors you’ll be using.

About 2 minutes into the tutorial, you’ll learn what Michael likes to do to create the most realistic paint patterns possible. He doesn’t spend a lot of time on this, so be sure to pay attention!

Also, be sure to pay attention to what Michael does in between color layers. It helps to speed the drying process and give the paint a tougher finish. Hint: it involves something you’ll find in a hair salon and in your wife’s selection of beauty tools 🙂

Baby Bass Pattern Shallow Crankbait

Baby Bass Pattern Shallow Crankbait Created Using Stencils

One of the cool things about this particular tutorial is the fact that Michael explains how he used to use a stencil when first learning how to paint a baby bass pattern crankbait. But because he likes to paint realistic patterns, he kept experimenting until he figured out how to do it without stencils. The results are truly impressive.

And you get the benefit of the time he spent experimenting, as he demonstrates it in the video below. This saves you a lot of work and trials, by taking what he learned and shares here, and putting it into practice.

And wait until you learn how to create scales on your custom crankbait! Get ready to dig into your wife’s beauty supplies again for this one! This one is something she uses to scrub and exfoliate her skin with!

And as you get into the part of the video where he reveals how to create the natural markings on the sides of the baby bass, be prepared to put the airbrush down and use another item that’s not typically talked about when it comes to painting crankbaits.

Toward the end of the video, learn the secrets to getting a natural-looking black pattern on the gill plates. Once again, this doesn’t involve using your airbrush. In fact, it doesn’t even involve using paint!

And as an added bonus, you’ll get a sneak peek at how to properly set up a paint booth, including a proper exhaust fan, and the drying wheel where your baits can dry properly without having to worry about your epoxy coat sagging or pooling in the process.

Enjoy the video and be sure to check out the list of items below that were used in this video.

Items Used in The Video:

Airbrush
Lure Paint
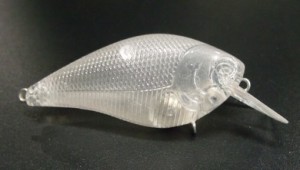
Unpainted Crankbait Body

Stick-on Lure Eyes
Treble Hooks
Split Rings
Oval Line Tie

If you enjoyed this post, please be sure to like it and share it with your friends.

And, as always, if you need any kind of lure-making supplies, be sure to visit our website, at http://lurepartsonline.com

To check out the Lure Me In Custom Painted Crankbaits Youtube channel, Click Here

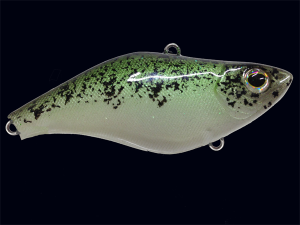
How to Paint a Crappie Pattern on a Crankbait

How to Paint a Crappie Pattern on a Crankbait

How to Paint a Crappie Pattern On a Crankbait

How to Paint a Crappie Pattern On a Crankbait

So, you want to learn how to paint a crappie pattern on a crankbait.

Well, we have just what you need, from the instructions on how to do it, to the tools and other items you need to do it with!

Our video tutorial for this post is from Michael Orensteen, the owner of Lure Me In Crankbaits.

Michael has been custom painting crankbaits for a while now and has some good experience under his belt. So he’s a qualified painter to pay attention to when he shows us his techniques.

For the crappie pattern, Michael shows us how he always starts by applying a base coat of white to all of his crankbaits. Next, a light coat of pearl white gets applied. In between coats of paint, a small hair dryer is used to heat-seal the paint and make sure it’s 100% dry before beginning to apply the next coat.

In the video tutorial, Michael reveals a secret technique for creating the black crappie markings on the sides of the lure body, using a special method and special tool. Hint; it’s not a brush!

Using the techniques in this blog post, learn how to paint a crappie pattern on your crankbait.

Using the techniques in this blog post, learn how to paint a crappie pattern on your crankbait.

Michael also goes into depth regarding tips and tricks for adjusting the pressure of your airbrush and working with the density of your paint in order to achieve optimal results and a very natural look to your finished lure.

This helps when blending colors in each consecutive layer, making sure that no single layer dominates the look of the lure.

And once the paint work is finished, Michael gives some great tips on how he uses epoxy to seal the bait and protect the paint, showing us yet another secret to give the lure added attraction.

So sit back, watch the great video and learn how to paint your own awesome custom crankbaits.

Items used for this project:

Airbrush
Lure Paint
Unpainted Crankbait Body
Stick-on Lure Eyes
Treble Hooks
Split Rings
Oval Line Tie

If you enjoyed this post, please be sure to like it and share it with your friends.

And, as always, if you need any kind of lure-making supplies, be sure to visit our website, at http://lurepartsonline.com

To check out the Lure Me In Custom Painted Crankbaits Youtube channel, Click Here
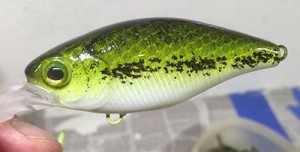
How To Airbrush Scale Patterns on Homemade Lures

How To Airbrush Scale Patterns on Homemade Lures

How To Airbrush Scale Patterns on Homemade Lures

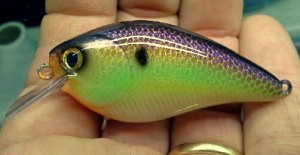
This is a great example of skilled airbrushing from Joe Haddock of Contentnea Creek Customs. Check out the scales on this one!

So you want to learn hot to airbrush scale patterns on homemade lures? Look no further!

We have an awesome tutorial by Paul Adams that will teach you how to airbrush scale patterns on homemade lures like a pro.

Paul covers the process from start to finish, including priming the bait in preparation for the actual painting process, starting out with a base coat of white paint and then following it up with additional colors and speeding up the drying process with a small heat gun.

Paul also shows what types of paint he uses and the colors used to create the scale effects on the lure.

After applying the base coat of white, Paul demonstrates his shading technique, creating a realistic look, with color depth varying from top to bottom. As with a real fish, the heavier coat gets applied to the top of the lure, fading it gradually to the belly area.

And, next, comes the scale netting, or mesh, which will be used to create that natural scale appearance on the sides of the bait. Paul shows how to wrap the mesh around the bait and secure it in place for spraying, using some common items, such as clothespins and alligator clips. As complicated or intimidating as this may seem at first, he shows us how easy it really is!

These are lures that Paul made and used for demonstration purposes in his video, as he teaches us Airbrush Scale Patterns on Homemade Lures

These are lures that Paul made and used for demonstration purposes in his video, as he teaches us how to airbrush scales on homemade lures

After spraying on the scales, watch as Paul then uses translucent paint to bring the lure to life with stunning colors!

After spraying with the translucent paint, Paul then discusses adding an eye and then using an epoxy clear coat to finish the bait, making the colors really “pop” and give it a protective layer of resin to make the paint last longer.

And as a side note, Paul also shows us his box of “bait rejects”, where he tosses baits that don’t meet his standards or maybe some that he tested or tried new methods on. Sometimes the molds don’t cast perfectly, or maybe he experiments with some new kind of finish, such as foil, etc., and those baits don’t meet his standards, so he tosses them into this box until such time he can take them out and fish with them, where he says he doesn’t worry about bouncing them off of rocks 🙂

Here’s the tutorial Video. Enjoy

Here’s a list of materials used, as well as links to them on the Lure Parts Online website.

Unpainted Lure Blanks
Airbrush & Airbrush Accessories
Lure Paint & Accessories
Scale Netting

You can check out Paul’s blog by Clicking Here.

If you enjoyed this tutorial, please be sure to share it with others.