How to Make a Chatterbait Style Bladed Jig
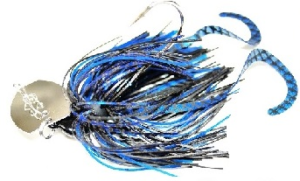 Bladed jigs catch huge numbers of fish, so we wanted to create this blog post to show you How to Make a Chatterbait Style Bladed Jig in a few very easy steps.
Some people like to pour their own lead jig heads and then paint them before assembling everything to get the finished product.
This gives them 100% flexibility when it comes to the style of the jig head, the color of the paint and the style of eyes they choose to use, if any.
Some people simply prefer to buy the finished parts and assemble the lure without the hassle of pouring, painting, etc. This makes it super easy because all you need to do is grab all of the parts you need and simply put together the combination of parts that will create the exact lure you need for the lakes and rives where you fish.
This way also requires much less effort, since there’s no need to pour lead or paint the heads prior to using them.
So What’s Next?
All it really takes at this point is to decide what size and color you want your bladed jig to be and then grab the necessary parts to make that happen.
In short, you will need a jig head, a blade, a split ring, a wire snap, and a skirt. That’s it. Once you know How to Make a Chatterbait Style Bladed Jig, those few parts are all you need. There are a couple other optional items that we will discuss a bit later, but they aren’t necessities.
Assembling Your Chatterbait Style Bladed Jig
 Once you’ve gathered your parts, here’s what you’ll need to do to create the actual lure.
First, you will need to attach a split ring to the blade, using a pair of high quality split ring pliers. The next step will be to attach the split ring to the eye of the jig head. If the blade is bare, with no sticker on it, it doesn’t matter which side faces forward or backward.
But if you do have a sticker applied, you will need to make sure the a sticker is facing forward before attaching the blade to the jig head. If you choose to leave the sticker off until the blade is attached to the jig head, you can simply apply the sticker later. This makes it easier because you can attach the blade without having to worry about this part of it.
The next step is to attach the snap to the blade. You will need to open the snap and then slide the open end down into the top hole on the front of the blade. Slide it all the way in until it moves somewhat freely (see the video below for an explanation of this).
Next, you will need to push the open end into the bottom hole on the back of the blade, and then move it slightly in order to get it to push back out through the front of the blade. Now you can simply close the snap and double check to make sure it’s firmly closed.
What to Do Now That The Jig Is Assembled
At this point, you’ve assembled the actual jig itself. The only thing left is to slide the skirt on. Once the skirt has been added you have a completely finished lure.
Let’s Talk About Customizing Options
 Earlier in the article, I mentioned a couple of different options that I would discuss later. So let’s talk about those.
First, with the blades there are a few different options. The finish of the blades can vary from bare stainless steel, to a few different types of plating. These blades are available with gold plate, silver plate, black nickel and a copper finish.
The various plating options allow you to create a bladed jig with a blade that’s tailored to the conditions you’ll be fishing, such as stained water, muddy water, clear water, etc. Or it can help to better imitate certain baitfish based on their color.
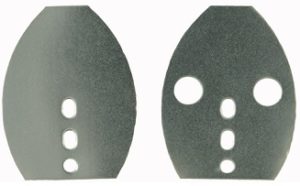
Another blade option is whether you want the blade to have “bubble holes” or not. Bubble blades are pre-drilled with extra holes that, in theory, leave a bubble trail in the water as the lure is retrieved.
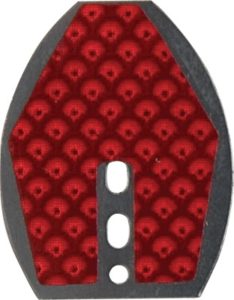
Lastly, for blade options, prismatic stickers are available in a wide variety of colors that will allow you to further customize the finished jig to whatever conditions you’ll be fishing it under.
These stickers can be applied before attaching the blade to the jig head, or afterward. It’s all a personal preference.
Choosing A Trailer
Most people choose to add a trailer of some type, to give the lure more action and more bulk. Trailers are available in a huge variety of styles, colors, shapes and sizes. You can choose the style that is best suited to your body of water and your own fishing style.
The video below talks about trailers, and which ones work best under various conditions.
Go Catch Some Fish!
That’s all there is to it. You now have a completely finished chatterbait style bladed jig that’s ready to go and catch some big fish! We hope you’ve found this article teaching you How to Make a Chatterbait Style Bladed Jig informative and enjoyable 🙂
Items used for this project:
- Shaker Jig Heads
- Split Rings
- Split Ring Pliers
- Jig Dancer Blades
- Silicone Skirt Materials
- Pre-Tied Silicone Skirts
- Rubber Skirt Material
- Skirt Collars
- Jig Tail Trailers
- Duo Lock Wire Snaps
- Soft Plastic Swimbait Bodies
- Dancer Jig Blade Stickers
If you enjoyed this post, please be sure to like it and share it with your friends.
If you’d like to learn how to tie a silicone finesse jig, click here.
Special thanks to Curt Snow Fishing for creating this great video.
And, as always, if you need any kind of lure-making supplies, be sure to visit our website, at http://lurepartsonline.com

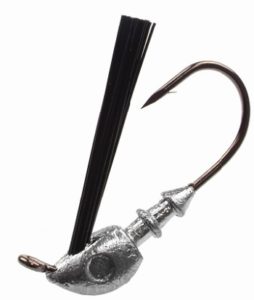 Spring time is a great time to learn how to make a swim jig. Then again, just about anytime is a good time to learn How to Make a Swim Jig!
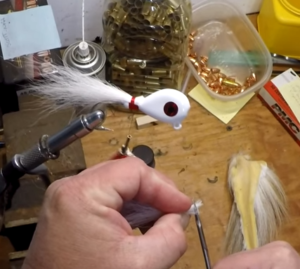 Whether you fish in freshwater or saltwater, knowing How to Tie Your Own Bucktail Jigs is an important skill to have.