How to Make a Buzzbait
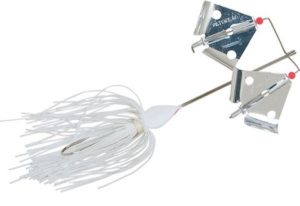
 Buzzbaits and Summer go together like peanut butter and jelly. So, since we’re moving into summer, in this post we’re going to learn How to Make a Buzzbait.
As you learn how to make a buzzbait, there are a few tips and tricks that will not only make it easier, but will also help you catch more fish with the buzzbaits you make. And these tricks are easy to implement, so you don’t need to worry about anything complicated.
Choosing The Right Buzzbait Head
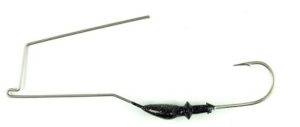
First, you want to make sure you’re working with a high quality buzzbait head that will last a long time. You also want a buzzbait head that climbs up onto the surface of the water quickly, and stays there without having to retrieve it too fast.
You also want a buzzbait head that keeps the hook below the surface of the water during the retrieve, which helps increase your hookup ratio, allowing you to hook and land more of the fish that hit. The Pro Planer Buzzbait head fits this description perfectly, since it features a “planing” head that has a flat bottom surface.
Choosing The Right Buzzbait Blade
 You will also need to choose the type of blade you want to use. There are several types of buzzbait blades to choose from, made from various materials, including aluminum and plastic.
Which type of blade you decide on will be based on the type of noise you want the buzzbait to make. Some buzzbait blades make more noise than others.
There are also varying numbers of “wings” on buzzbait blades, ranging from 2 to 4 wings. The more wings a blade has, the slower you can retrieve it and still keep it on the water’s surface. Blades with more wings will also create a “smoother” sound.
You can also get buzzbait heads that allow the use of two blades. This configuration will let you build a bait that pretty much crawls across the surface at the slowest possible pace. This is great for fishing after dark, giving the bass more time to find your lure and attack it from below.
Let’s Talk About Skirts
The skirt will be the primary component that will create the color palette, if you will. You can choose from a slew of color patterns when it comes to pre-tied skirts.
But you can customize even further if you want to take the time and effort to make your own skirts. The possibilities are endless when it comes to what prey you want to imitate. Choosing different color combinations can also help tailor a bait to specific weather conditions, amounts of daylight or levels of water clarity.
In the end, most people tend to pick colors that they have confidence in on their local lakes and rivers.
Putting It All Together
After you’ve picked all of your components, it’s just a matter of putting it all together to create a finished bait.
The process is really straight forward and doesn’t require any special tools. The only tool needed is a decent pair of needle nosed pliers.
Assembly is easy, especially if you have a tutorial to follow. So be sure to watch the video below. It gives a great walk-through when it comes to assembly. It also gives some great pointers to tweak your bait to help it attract more fish.
Items used for this project:
- Buzzbait Heads
- Buzzbait Rivets
- Buzzbait Blades
- Buzzbait Skirts
- A Good Pair of Pliers
If you enjoyed this post, please be sure to like it and share it with your friends.
And, as always, if you need any kind of lure-making supplies, be sure to visit our website, at http://lurepartsonline.com
If you enjoyed this article, you might also want to read this article, Spinnerbait and Buzzbait Mods to Catch More Fish.
