How to Make a Balsa Jerkbait
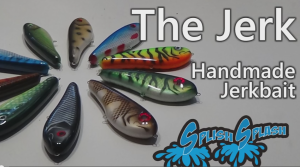
 Today you’re going to learn how to make a balsa jerkbait from scratch.
Jerkbaits are a staple in fishing. They have become popular for pursuing a number of different species of fish across a huge number of countries.
The “How to Make a Balsa Jerkbait” video tutorial below is from YouTube user “Splish Splash”. He does a great job of walking us, step-by-step, through the entire process of making the bait and making it easy to understand and follow.
The lure maker starts by explaining that he prefers to cut several pieces of balsa, instead of just cutting what is sufficient for making one jerkbait. He saves time doing it this way because it saves him from having to trace the pattern onto other pieces of wood later on.
Then, it’s on to cutting the balsa wood by hand, a coping saw. Due to balsa wood being soft, cutting by hand is very easy and doesn’t take long at all. Cutting by hand also gives you much better control of the saw, so there is less chance of making major mistakes while cutting 😉
After cutting them, the pieces are then sanded by hand. This smooths the edges of the wood and make the pieces uniform in shape and size.
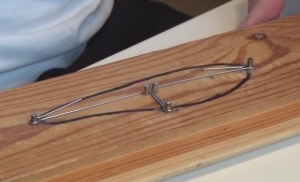
 Next, it’s on to outfitting the lure body with a through-wire. To assist with making this easier, he has actually created a special wire bender to help shape the wire perfectly for the lure that’s being made. The video shows us the tool, so you can make one too, if you choose to do so. Using the through-wire construction, a one-piece connection is created for every piece of hardware on this bait.
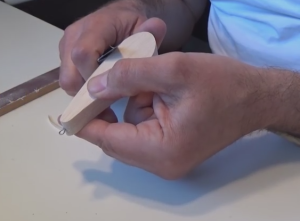
After bending the wire, braided fishing line is then used to secure the parts of the wire together and keep it straight while working with it and rigging it in your new jerkbait body. The wire is then set into the body using nothing more than hand pressure. No power tools required!
Next, it’s on to adding weights to the lure. Homemade lead bars are used, which are cut to length by hand and then inserted into the two halves of the bait, using holes that are cut into the inside of the lure body using an exacto knife. Again, no power tools are utilized.
Now it’s time to assemble your new Jerkbait!
Water-resistant glue is used to hold the two halves of the body together, as well as holding the weights and through-wire in place as the two halves are put together. Once they’re glued together, a clamp is used to hold everything in place while the glue dries thoroughly.
 Now comes the fun part of shaping the lure to get it just right. The specs for the final thickness of the lure are found in the PDF file that we’ve linked to below. They are also mentioned in the video tutorial.
Keep in mind as you shape your lure that balsa is extremely soft, so very little pressure is required when sanding or carving!
Being too aggressive can cause the lure to be ruined by taking too much wood off with one swipe of your knife or one motion with the sandpaper!
Once the lure is shaped and you’re happy with the way it looks, it’s time to apply some epoxy to seal the body and make it waterproof. This is done using Envirotex epoxy that gets applied by hand, using a small brush. Once the epoxy is applied, the lure is rotated on a small homemade device. The rotation keeps the epoxy from dripping or forming hardened drips on the actual lure body.
Be sure to pay close attention to the tip that is shared, showing us how to eliminate bubbles in the epoxy base coat!
A little touch of sandpaper is used to smooth the epoxy base coat, and then another layer of epoxy is added. Once the second layer of epoxy has had time to harden, it’s time to paint!
 Painting can be done using several different methods; brush, airbrush, spray can or even some other way of applying the paint. For best results, an airbrush is recommended. But since this is your lure, you decide how to paint it!
And of course, once the lure is painted, it’s back to the final 3-5 layers of epoxy topcoat, to protect that awesome paint work that you just did.
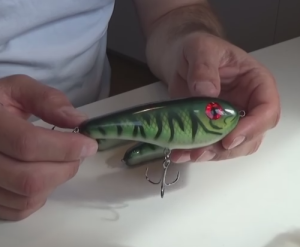
Add some hooks and split rings and you’re ready to fish!
For a free lure stencil that you can print and cut out, click here
Items used for this project:
Balsa Lure Bodies (in case you don’t want to carve your own)
Stainless Steel Wire
Lure Eyes
Split Rings
Treble Hooks
Epoxy Top Coat
To see a great video of these lures in action, catching Northern Pike in brackish water, click here
If you enjoyed this post, please be sure to like it and share it with your friends.
And, as always, if you need any kind of lure-making supplies, be sure to visit our website, at http://lurepartsonline.com
