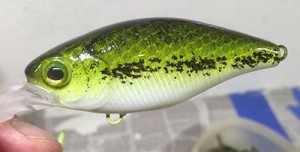
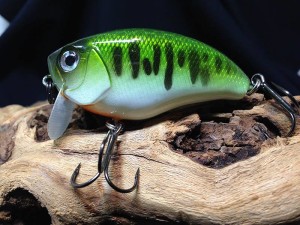
How to Paint a Baby Bass Pattern Crankbait
In this latest post, we’ll show you how to paint a baby bass pattern crankbait!
Michael Orensteen will be demonstrating, once again, how to take a blank, unpainted crankbait body and turn it into a custom-painted crankbait that you’ll be proud to show to your fishing buddies.
Not only will it look good in your tackle box, but it will catch fish as well as, if not better than, store-bought lures that are owned by the masses. And you’ll fish your new crankbait with confidence, knowing that you created it yourself 🙂
There are a few tricks to knowing how to paint a baby bass pattern crankbait in a realistic way, and the video below will show you everything you need to know to accomplish it with less effort than you think.
As you start, you’ll learn the importance of spraying on a good base coat, before doing anything else. This gives you a good foundation to work from and saves you a lot of time and extra paint when applying the other colors you’ll be using.
About 2 minutes into the tutorial, you’ll learn what Michael likes to do to create the most realistic paint patterns possible. He doesn’t spend a lot of time on this, so be sure to pay attention!
Also, be sure to pay attention to what Michael does in between color layers. It helps to speed the drying process and give the paint a tougher finish. Hint: it involves something you’ll find in a hair salon and in your wife’s selection of beauty tools 🙂
One of the cool things about this particular tutorial is the fact that Michael explains how he used to use a stencil when first learning how to paint a baby bass pattern crankbait. But because he likes to paint realistic patterns, he kept experimenting until he figured out how to do it without stencils. The results are truly impressive.
And you get the benefit of the time he spent experimenting, as he demonstrates it in the video below. This saves you a lot of work and trials, by taking what he learned and shares here, and putting it into practice.
And wait until you learn how to create scales on your custom crankbait! Get ready to dig into your wife’s beauty supplies again for this one! This one is something she uses to scrub and exfoliate her skin with!
And as you get into the part of the video where he reveals how to create the natural markings on the sides of the baby bass, be prepared to put the airbrush down and use another item that’s not typically talked about when it comes to painting crankbaits.
Toward the end of the video, learn the secrets to getting a natural-looking black pattern on the gill plates. Once again, this doesn’t involve using your airbrush. In fact, it doesn’t even involve using paint!
And as an added bonus, you’ll get a sneak peek at how to properly set up a paint booth, including a proper exhaust fan, and the drying wheel where your baits can dry properly without having to worry about your epoxy coat sagging or pooling in the process.
Enjoy the video and be sure to check out the list of items below that were used in this video.
Items Used in The Video:
Airbrush
Lure Paint
Unpainted Crankbait Body
Stick-on Lure Eyes
Treble Hooks
Split Rings
Oval Line Tie
If you enjoyed this post, please be sure to like it and share it with your friends.
And, as always, if you need any kind of lure-making supplies, be sure to visit our website, at http://lurepartsonline.com
To check out the Lure Me In Custom Painted Crankbaits Youtube channel, Click Here


