How To Make a Topwater Bass Popper
 Want to learn how to make a topwater bass popper? We have a great tutorial video for you right here.
The topwater bass popper has been around for a very long time. This type of topwater lure has caught countless numbers of bass over the decades. It’s safe to say that it’s probably one of the most popular topwater lures for catching bass with, no matter what part of the world you’re located in.
This tutorial will show you how to make a topwater bass popper, step by step.
Let’s get started!
The first thing you’ll need is a piece of wood material that will be used to make the actual popper lure body. The video suggests using a wood dowel. China hardwood is recommend for its ease in carving, vs. oak.
The first step will be to cut the dowel rod into pieces that are 2 7/8 or 3 inches inches in length, whichever you prefer. And once you’ve cut your pieces to the desired length, grab the one that you’ll be using to make a your first popper.
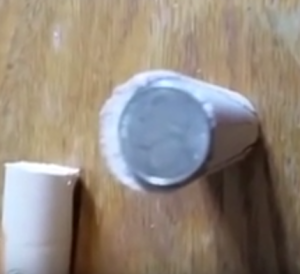
 Stand the piece upright and place a nickel on the top end, offset so that the nickel touches one side of the circumference, but not the other.
Once you’ve done this, trace around the outside of the nickel with a pencil. This outline will give you a pattern for the front of the popper.
Next, you’ll trace out the tail end of the popper, using a pencil eraser. Move the edge of the pencil eraser to the outside edge of the wood dowel, being sure to line it up with the marks that were created on the other end, using the nickel.
Lines will then need to be drawn down the length of the dowel to create the outline that will be used to shape the body into a popper shape. Material inside of this outline will not be carved away. This also defines the bottom of the lure, where screw eyes will be added, to hold the hooks later on.
 Now we’ll start the actual carving, using a utility knife, or something similar.
Start by carving from the top of the lure (the large end), toward the bottom end. Remove small amounts of material at a time. This prevents mistakes that will be irreversible.
Once the top end of the popper is carved, it’s time to move down and carve the smaller end, for the tail of the lure.
Carving doesn’t have to be precise if you don’t want it to be. Your goal is to obtain the basic shape of the popper. You don’t need to be concerned with creating a perfectly smooth surface if you don’t want to.
If you choose to forego sanding and perfecting of the lure’s surface, the next step will be to form the mouth of the popper, which will allow it to pop and gurgle when the bait is twitched or “popped” on the surface.
This part of the project is accomplished with a Dremel, using a small sanding tip. The idea here is to create an angled shape on the front of the lure. Once the initial angle is created, the face of the popper can then be hollowed out, to create a concave surface.
Once the face of the lure is shaped to your satisfaction, it’s time to give your lure some personality, with paint!
In the video tutorial, the luremaker suggests using Sharpie or other permanent markers to create the color pattern you want. While this is OK to do, it doesn’t give the lure a finished look, the way paint would. But it’s ultimately up to you to decide if you want it to look great, or just catch fish 🙂
Once the color is applied, whether it’s been painted or colored with Sharpie markers, it’s time to add the screw eyes. You’ll need 3 screw eyes total. One is for the rear hook, one for the center hook and one on the front of the lure, which will be your line tie.
When placing the screw eyes on the bottom of the lure, be sure to place them far enough apart to prevent the hooks from catching on each other!
After placing the screw eyes, it’s time to seal the lure, to prevent water from getting into the wood body and ruining your lure. The luremaker uses good old urethane, but we recommend using an epoxy topcoat, for the sake of durability.
The video explains the remaining few steps left to finish your lure, including good info on what treble hooks to use.
We hope you’ve enjoyed learning how to make a topwater bass popper. Have fun making your new poppers and enjoy catching bass on them!
Here’s the video tutorial.
If you prefer to use a wood popper body that’s already been shaped for you, click here.
Items used for this project:
Wood Popper Bodies (in case you don’t want to carve your own)
Lure Eyes
Split Rings
Round Bend Treble Hooks
Screw Eyes
Epoxy Top Coat
Quick Coat Permanent Lure Markers
If you enjoyed this post, please be sure to like it and share it with your friends.
And, as always, if you need any kind of lure-making supplies, be sure to visit our website, at http://lurepartsonline.com
