Painting a Pike Pattern Lure
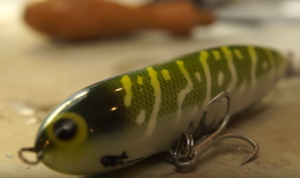
 Painting a pike pattern lure isn’t something that too many lure painters or lure makers talk about. Most people tend to stick to the more popular patterns, such as bluegills, baby bass and perch.
But in areas where Pike are the prevalent gamefish, it makes perfect sense to create a lure that mimics a juvenile Northern Pike. So painting a pike pattern lure is something that lure makers for those parts of the world should learn.
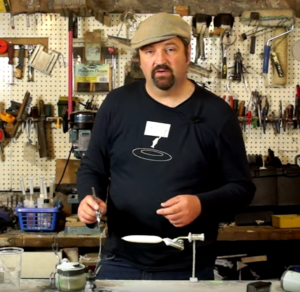
Once again, today’s tutorial presenter is Paul Adams. Paul has been at this craft for a long time and has created a great video showing that painting a pike pattern lure isn’t as difficult as some might think.
So let’s get started!
Paul starts off with a Zara Spook lure body that he made from a broom handle. He has held a contest and will be painting this lure for the winner of that contest. Paul even throws in a bit of personalization for the proud winner by adding decals to the lure.
Paul explains that he has given the lure two coats of 5-minute epoxy to seal the wood lure body and protect it from moisture. @ coats of white primer are then sprayed on as a base coat.
He then goes on to spray the lure body with some black acrylic ink called Liquitex. The black is used as a foundation for the remainder of the paint work. Using black prevents the white from showing through when he starts using shades of green.
Paul alternates between his airbrush and a hair dryer, making sure to keep the ink drying quickly so as to prevent any problems with it running or sagging. The black is sprayed on the entire lure body, with the exception of the belly area.
And then it’s time to start making it look more like a baby pike!
Now it’s time to put some special “tools” to use. First up is a piece of scale netting that will be used to paint the scale pattern on the lure body. This effect adds a lot of realism to the lure. White paint is used for this. And the white paint gets thinned down to prevent the scales from being too overpowering.
Scales have to be sprayed on very lightly. The paint should dry almost immediately upon hitting the surface of the lure blank. Once again, a hair dryer can be used to speed up the drying process, if needed.
After the white scales are completed, it’s time for some gold scales. And using a hair dryer to speed up the drying process is a good idea. Once everything has dried completely, then the scale netting can be removed.
More paint is sprayed onto the back and sides of the lure. This time it’s a green color. This paint is sprayed lightly and it is fairly transparent. So it allows the previously painted scales to continue to show through.
Black is then sprayed on the back of the lure and in the area where the eyes will be located. And then some more white is sprayed onto the belly area to clean things up a bit. This is necessary due to the fact that all of the other spraying kind of overlaps in the belly area and doesn’t look quite as nice as it could.
Now it’s time to grab a white acrylic marker and draw some stripes on the side of the lure. This helps mimic more accurately the coloring of a juvenile pike, versus an adult pike. And then it’s time to spray on the eyes. This is done using a piece of plastic with holes punched in it.
There are still a few minor steps left to complete this lure. But we’ll let Paul show you in the video below.
Enjoy!
Items used for this project:
- Stick On Lure Eyes
- Treble Hooks
- Split Rings
- Lure Paint
- Lure Paint Markers
- 5 Minute Epoxy
- Scale Netting
- Airbrushes & Supplies
If you enjoyed this post, please be sure to like it and share it with your friends.
And, as always, if you need any kind of lure-making supplies, be sure to visit our website, at http://lurepartsonline.com
