How to Make a Wooden Fishing Lure on a Lathe
 For today’s article, you’ll be learning how to make a wooden fishing lure on a lathe. British lure maker Paul Adams will be your host and instructor 🙂
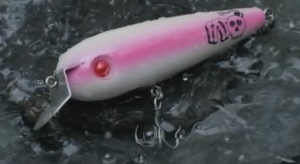
Paul shows us how to build the Fat Head Wiggler, an old-school wooden swimming lure with a metal diving lip. He begins by teaching us how to prepare the template and the wood, cutting the template out and gluing it to a sheet of veneer to get started.
Once preparing the template is finished, Paul sets about the task of actually creating the lure in earnest, showing us how to cut the wood into the proper size and then mark the center of each end in preparation for securing it in the lathe.
Once we get past these few little steps, the power tools come alive and we see sawdust and wood chips flying everywhere as Paul begins to shape the wood.

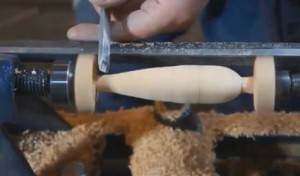
Paul works his skills on a wood lathe to shape the lure
Watching Paul work the lathe is amazing. He also shows us how he uses calipers to measure the wood, to be sure it’s the correct diameter and shape. Again, precision is evident in his methods and workmanship.
And, of course, once the desired size and shape are attained, Paul goes about sanding the wood body to get a perfectly smooth surface, to be painted later on. It’s amazing to watch how the various tools come into play to create the finished product.
There is a wide variety of power tools that are used in this video, including a wood lathe, a drill press, a band saw and a dremel. Other items used include sandpaper, epoxy, paint and various pieces of hardware to finish the lure. We have listed all of the hardware items below the video.

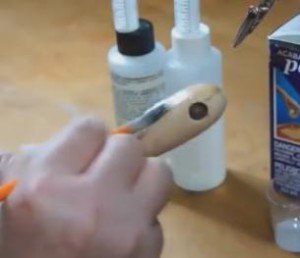
Sealing the lure protects the wood body from water damage
When Paul makes a homemade lure, he typically uses very few, if any, factory-made components. This is a great way to make something that you can say is 100% handmade and your own workmanship.
Some people, though, like to save time, or may not have all of the tools necessary to create the components themselves, so they opt to buy them and then assemble the lure. Either way, you end up with a nice lure that can’t be bought anywhere else.
To complete the lure in the video, Paul fabricates the diving lip from aluminum, creates the belly weight out of steel rod and even hand-draws a black & white emblem to put on the sides of the lure.
Paul is a true craftsman and artisan who has lots of creativity and uses it to create great lures and then teach others how to do the same thing.
So go ahead and enjoy the video below and be sure to check out the list of items needed, at the Lure Parts Online website.
Here’s a list of materials used, as well as links to them on the Lure Parts Online website.
Wood Lure Blanks
Stainless Steel Split Rings
Treble Hooks
Metal Diving Lips
Stainless Steel Screw Eyes
Epoxy Topcoat
Vinyl Lure Paint
You can check out Paul’s blog by Clicking Here.
If you enjoyed this tutorial, please be sure to share it with others.
