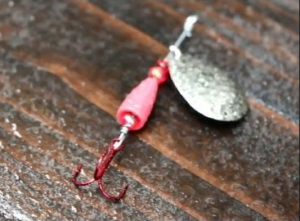
How To Build a Double Cowgirl Musky Inline Spinner
 If you’re a hardcore Musky angler, you will undoubtedly want to learn How To Build a Double Cowgirl Musky Inline Spinner.
Double Cowgirl Musky Inline Spinners catch some monster fish. And building them yourself will save you a ton of cash over the years. You also get the option of making custom colors and configurations by making your own baits.
Building these spinners isn’t difficult. But sometimes it can be intimidating to get started. The video below will walk you through the entire process, from tying the skirt to assembling and finishing the bait.
You can get started by clamping a small piece of coiled wire in your vise and creating your own skirt with tinsel and thread. Creating the skirt is actually the most time-consuming part of the whole process.
Once the skirt has been tied, it’s time to start assembling the rest of the parts to build your inline musky spinner.
The Skirt is Finished. Now What?
Now we’ll take a treble hook, a wire shaft, a piece of heat shrink tubing, 2 magnum Colorado spinner blades (size 10), a solid brass lure body (approximately 3/8 oz.), clevises, hollow metal beads, a split ring and a lead egg sinker.
Now it’s time to assemble all of these items.
The first thing you’ll do is add the treble hook to the wire shaft and then secure it with a piece of heat shrink tubing.
Once the heat shrink tubing has been slid into place, heated and then allowed to cool, the rest of the process involves sliding various components onto the wire shaft to create the actual spinner assembly.
Probably the trickiest part is making sure the two clevises are installed correctly so the two blades work in conjunction with each other. So be sure to pay close attention when doing that part of the assembly!
The final step is to bend the end of the wire into a loop where your line will be tied on. This involves making a couple of bends and then twisting the wire around the wire shaft. When you’re finished with the twists, the excess wire can be trimmed off with wire cutters.
Now, go and catch a big musky!
Items used for this project:
- Mega-Flash Tinsel Hanks
- Bucktail Coils
- Treble Hooks
- Split Rings
- Round Nose Pliers
- Wire Shafts
- Magnum Colorado Blades
- Brass Lure Bodies
- Metal Beads
If you enjoyed this post, please be sure to like it and share it with your friends.
If you’d like to learn how to make spinnerbaits for bass, click here.
And, as always, if you need any kind of lure-making supplies, be sure to visit our website, at http://lurepartsonline.com

 If you make a simple inline spinner from a kit, you’ve just made one of the best fish catchers known to man! And because you made it from a kit, you didn’t have to shop around for lots of different parts.