How To Airbrush Scale Patterns on Homemade Lures

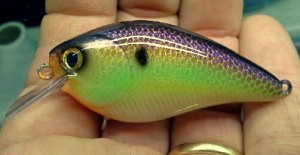
This is a great example of skilled airbrushing from Joe Haddock of Contentnea Creek Customs. Check out the scales on this one!
So you want to learn hot to airbrush scale patterns on homemade lures? Look no further!
We have an awesome tutorial by Paul Adams that will teach you how to airbrush scale patterns on homemade lures like a pro.
Paul covers the process from start to finish, including priming the bait in preparation for the actual painting process, starting out with a base coat of white paint and then following it up with additional colors and speeding up the drying process with a small heat gun.
Paul also shows what types of paint he uses and the colors used to create the scale effects on the lure.
After applying the base coat of white, Paul demonstrates his shading technique, creating a realistic look, with color depth varying from top to bottom. As with a real fish, the heavier coat gets applied to the top of the lure, fading it gradually to the belly area.
And, next, comes the scale netting, or mesh, which will be used to create that natural scale appearance on the sides of the bait. Paul shows how to wrap the mesh around the bait and secure it in place for spraying, using some common items, such as clothespins and alligator clips. As complicated or intimidating as this may seem at first, he shows us how easy it really is!

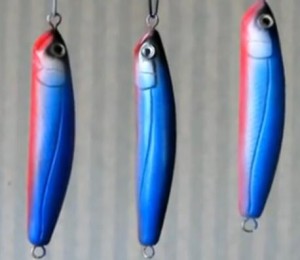
These are lures that Paul made and used for demonstration purposes in his video, as he teaches us how to airbrush scales on homemade lures
After spraying on the scales, watch as Paul then uses translucent paint to bring the lure to life with stunning colors!
After spraying with the translucent paint, Paul then discusses adding an eye and then using an epoxy clear coat to finish the bait, making the colors really “pop” and give it a protective layer of resin to make the paint last longer.
And as a side note, Paul also shows us his box of “bait rejects”, where he tosses baits that don’t meet his standards or maybe some that he tested or tried new methods on. Sometimes the molds don’t cast perfectly, or maybe he experiments with some new kind of finish, such as foil, etc., and those baits don’t meet his standards, so he tosses them into this box until such time he can take them out and fish with them, where he says he doesn’t worry about bouncing them off of rocks 🙂
Here’s the tutorial Video. Enjoy
Here’s a list of materials used, as well as links to them on the Lure Parts Online website.
Unpainted Lure Blanks
Airbrush & Airbrush Accessories
Lure Paint & Accessories
Scale Netting
You can check out Paul’s blog by Clicking Here.
If you enjoyed this tutorial, please be sure to share it with others.
