Author Archives: Lure Parts Online

Make A Spinnerbait for Night Fishing

Make A Spinnerbait for Night FishingNight fishing for bass isn’t as popular as daytime fishing. But that doesn’t mean it’s not effective! Read on to learn how to make a spinnerbait for night fishing that will catch more bass than any other lure you choose to try.

It’s no secret that big bass like to feed after dark, especially during the warmer months. Big bass are easier to fool after dark, since they are less able to detect anything about your lure that shows them that it’s not real.

As you set out to Make A Spinnerbait for Night Fishing, there are a few very important things you can do to make your spinnerbaits catch far more fish than spinnerbaits sold in stores. And that is exactly what we will be discussing in this article.

Bait Sizes

The size of the spinnerbait you throw after dark is one of the biggest factors that will help you catch bigger fish. When you Make A Spinnerbait for Night Fishing, it has to be bulky. It needs to be big enough to create a commotion that will get the attention of a big bass and get that bass to attack it.

The depth of the water you’ll be fishing will also be a factor. Deeper water will require a heavier bait. But it’s important to remember that deep is relative for whatever body of water you’re fishing. So, here’s a rule of thumb for night spinnerbait sizing.

If the water is 6 feet deep or less, a 1/2 oz. bait will be sufficient. If you’re fishing 6-12 feet, bump it up to a 3/4 oz. bait. Water deeper than this will require a 1 oz. bait, preferably with a bit smaller blade than you would use for shallow water. The smaller blade will allow the bait to stay down deeper where it can hug the bottom better.

Bait Color

Big Bass Caught at Night on a SpinnerbaitNight fishing spinnerbaits will almost always work best in dark colors. Black and purple are both good colors. Blades also don’t need to be bright, so there is no need to use bright, shiny blades when you Make A Spinnerbait for Night Fishing.

Brass blades are a great choice for night spinnerbaits because they don’t give off as much shine as the plated blades do. And a brass blade will usually get duller over time, making it more effective in low-light conditions.

Choosing the Right Wire

One of the biggest keys to making a spinnerbait that works well after dark is making sure that it gives off as much vibration as possible. Bass feed at night primarily by vibration, using the lateral line to detect motion and find their prey.

Heavy wire robs a lure of much of its vibration, so lighter wire is best. Stick to wires between .35 and .40 diameter. Keep in mind, also, that R-bend wire is better than the wire with the twisted eye when it comes to allowing the wire to vibrate as much as possible.

Best Blade for Night Fishing

Hammered Colorado BladeThe undisputed king of blades for night fishing is the Colorado blade. A spinnerbait with a single Colorado blade will create far more vibration than any other blade style or combination.

Blades in the size 6 – 8 range will work best, depending the depth you plan on fishing.

1/2 baits will work well with a size 6 or 7, while heavier baits will be better equipped with a size 7 or size 8.

Keep in mind that the depth you’ll be fishing will also come into play when choosing a blade size. Fishing water deeper than 8-10 feet is usually best done with blades in the size 6 or 7 range on a heavy bait. Bigger blades will tend to give the bait too much “lift”, causing it to rise out of the strike zone when retrieved.

Skirt Colors

As with the color of the lure body, the color of your skirt should also be dark. Black, or a combination of Black & Blue or Black & Purple will work well anywhere.

Sometimes it pays to experiment with other secondary colors to mix with the black. Red or blue will also work well.

Just remember that the primary goal of the skirt is to help present a bulky profile, so the darker colors help with creating that look by creating a better silhouette in low-light conditions.

What About The Swivel?

For the swivel, keep it simple. Use only a ball bearing swivel. You’ll want that large Colorado blade to spin easily. The best way to make sure that happens is by using a high-quality swivel that turns as easily as possible.

Putting it All Together

Once you’ve chosen your components and decided on the size of the lure you want to build, it’s time to assemble it all. You can watch the short video below for a quick how-to demo.

Once you’ve put a few of these together, go out and enjoy catching big bass after dark!

Items used for this project:

If you enjoyed this post, please be sure to like it and share it with your friends.

And, as always, if you need any kind of lure-making supplies, be sure to visit our website, at http://lurepartsonline.com

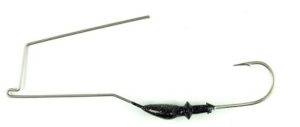
How to Make a Buzzbait

How to Make a Buzzbait

How to Make a BuzzbaitBuzzbaits and Summer go together like peanut butter and jelly. So, since we’re moving into summer, in this post we’re going to learn How to Make a Buzzbait.
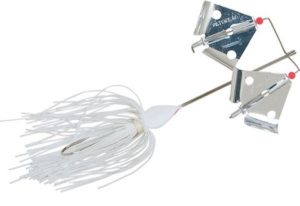
As you learn how to make a buzzbait, there are a few tips and tricks that will not only make it easier, but will also help you catch more fish with the buzzbaits you make. And these tricks are easy to implement, so you don’t need to worry about anything complicated.

Choosing The Right Buzzbait Head

First, you want to make sure you’re working with a high quality buzzbait head that will last a long time. You also want a buzzbait head that climbs up onto the surface of the water quickly, and stays there without having to retrieve it too fast.

You also want a buzzbait head that keeps the hook below the surface of the water during the retrieve, which helps increase your hookup ratio, allowing you to hook and land more of the fish that hit. The Pro Planer Buzzbait head fits this description perfectly, since it features a “planing” head that has a flat bottom surface.

Choosing The Right Buzzbait Blade

Double Arm BuzzbaitYou will also need to choose the type of blade you want to use. There are several types of buzzbait blades to choose from, made from various materials, including aluminum and plastic.

Which type of blade you decide on will be based on the type of noise you want the buzzbait to make. Some buzzbait blades make more noise than others.

There are also varying numbers of “wings” on buzzbait blades, ranging from 2 to 4 wings. The more wings a blade has, the slower you can retrieve it and still keep it on the water’s surface. Blades with more wings will also create a “smoother” sound.

You can also get buzzbait heads that allow the use of two blades. This configuration will let you build a bait that pretty much crawls across the surface at the slowest possible pace. This is great for fishing after dark, giving the bass more time to find your lure and attack it from below.

Let’s Talk About Skirts

The skirt will be the primary component that will create the color palette, if you will. You can choose from a slew of color patterns when it comes to pre-tied skirts.

But you can customize even further if you want to take the time and effort to make your own skirts. The possibilities are endless when it comes to what prey you want to imitate. Choosing different color combinations can also help tailor a bait to specific weather conditions, amounts of daylight or levels of water clarity.

In the end, most people tend to pick colors that they have confidence in on their local lakes and rivers.

Putting It All Together

After you’ve picked all of your components, it’s just a matter of putting it all together to create a finished bait.

The process is really straight forward and doesn’t require any special tools. The only tool needed is a decent pair of needle nosed pliers.

Assembly is easy, especially if you have a tutorial to follow. So be sure to watch the video below. It gives a great walk-through when it comes to assembly. It also gives some great pointers to tweak your bait to help it attract more fish.

Items used for this project:

If you enjoyed this post, please be sure to like it and share it with your friends.

And, as always, if you need any kind of lure-making supplies, be sure to visit our website, at http://lurepartsonline.com

If you enjoyed this article, you might also want to read this article, Spinnerbait and Buzzbait Mods to Catch More Fish.

Build Your Own Kastmaster Style Fishing Spoons

Build Your Own Kastmaster Style Fishing Spoons

Kastmaster style spoons have been around for decades. They flat out catch fish, whether in freshwater or saltwater. So we’d like to show you how to Build Your Own Kastmaster Style Fishing Spoons, and save some money in the process.

With these lures being made of solid steel, the prices have recently started climbing substantially. And, with these increases, this style of lure is no longer inexpensive to buy.

Save Money By Making Them Yourself

But, there is good news! We’re going to show you how to Build Your Own Kastmaster Fishing Spoons for Cheap, saving you some of your hard-earned money for other things.

You can learn to Build Your Own Kastmaster Fishing Spoons. It’s quite simple to do, since there are only a few components involved. The time it will take you to make one is minimal, at less than 5 minutes.

We’ve listed all of the required components below, as well as a few accessories to make the task even easier. And the only tools you will need is a pair of good split ring pliers. You can see them here.

Quick, Easy Lure Assembly

Be sure that you know the front of the lure from the back, since they look pretty much the same at a quick glance. On these lures, the front is the skinnier end, and the rear is the fatter end. So be sure to attach your hook to the fat end.

Select the size spoon you’d like to work with in order to get started. Then add a single treble hook to the tail split ring. If you don’t want any further customizations, you’re all done.

Customize Your Spoon

But, if you prefer to build your lures to suit a particular species or a certain body of water, then feel free to use lure tape or lure dip to very quickly and easily customize the color of the bait.

Sometimes the slightest variation in color can make the difference between getting bites or going home empty-handed. So don’t be afraid to experiment!

The video below walks you through the steps to Build Your Own Kastmaster Style Fishing Spoons. So follow along, and then take your new spoons out and catch some fish!

Items used for this project:

If you enjoyed this post, please be sure to like it and share it with your friends.

If you’d like to learn how to make a Chatterbait style bladed jig, click here.

Special thanks to Spilt Milt Productions for creating this great video.

And, as always, if you need any kind of lure-making supplies, be sure to visit our website, at http://lurepartsonline.com

How to Tie a Wooly Bucktail Hair Jig

How to Tie a Wooly Bucktail Hair Jig

How to Tie a Wooly Bucktail Hair JigIt’s late in the Fall season here in the USA, so the water temperatures are dropping as we move closer to Winter. Seasoned anglers know that hair jigs catch more fish in cold water than standard silicone-skirted jigs. They are especially good at catching big smallmouth bass. So sit back and learn How to Tie a Wooly Bucktail Hair Jig, so you can put more fish in the boat this late fall season!

The list of items used for the Wooly Bucktail Hair Jig is pretty short, the core of which is a small leadhead jig that’s had the lead collar cut off. We will include a complete list of the items at the end of this post.

Getting Started

After securing your jighead in your vise, you’ll need to apply a light coat of brush-on super glue to the hook shank. This helps to keep the thread from sliding down the shank when the lure is finished.

Next, you’ll apply some base wraps with your 210 Denier thread. After this, you’ll begin layering your bucktail on with your thread and bobbin. Be sure the bucktail covers the hook all the way around, not just on the top or the bottom.

Layers and More Layers

How to Tie a Wooly Bucktail Hair JigYour next step will be to use some crystal flash accents in the skirt, to give it some highlights. The Krystal Flash gets doubled over, which makes it impossible for it to be pulled out later on when fishing with it.

You’ll now be adding some deer belly hair. This gives the jig a sort of “head” that completely changes the jig’s profile. The dear hair is tied onto the jig using a zig-zag type of motion, which prevents the hair from getting flattened out as the thread is wrapped around it.

As with the initial layers of bucktail, be sure the deer hair covers all around the jig evenly. Scissors will be used to trim the deer belly hair on a taper. But be sure not to accidentally cut the bucktail when doing this.

The abundance of deer belly hair causes the jig to fall very slowly, making it very hard for the bass to ignore as it falls into its habitat. This means that the vast majority of bites you get will be as the jig drops to the bottom.

The final piece of this jig is some living rubber strands that you’ll add. Living rubber works much better in cold water than silicone skirt material. So it’s important not to use silicone for this step. You’ll be using 6 strands for this jig.

Give the rubber legs a nice collar to hold it all in place, and then whip finish it to complete the tying steps.

The final step is to apply some head cement.

There you have it! You’ve learned How to Tie a Wooly Bucktail Hair Jig! Now go catch some fish with it!

Items used for this project:

If you enjoyed this post, please be sure to like it and share it with your friends.

If you’d like to learn how to wire tie a Jig skirt, click here.

And, as always, if you need any kind of lure-making supplies, be sure to visit our website, at http://lurepartsonline.com

How to Tie a Peanut Head Smallmouth Jig

How to Tie a Peanut Head Smallmouth Jig

How to Tie a Peanut Head Smallmouth JigAs fall moves in, Smallmouth anglers across the USA are gearing up to catch big smallies on various jigs. So we wanted to show you How to Tie a Peanut Head Smallmouth Jig so you can take advantage of this great bait.

It’s well known that smallmouth typically prefer very specific kinds of baits. This is also true when it comes to jigs.

And when you tie your own jigs, it gives you even more versatility when it comes to creating that perfect jig that’s just what the smallies in your home lake will devour.

Why a Peanut Jig?

These jigs have a smaller profile than typical jigs used for largemouth bass. They also use colors that are a bit different. And because many smallmouths inhabit areas with few or no weeds, you don’t even need to worry about a weed guard or brush guard on them.

The cool part is that this jig is actually built on a head designed for Walleye. But because jigs are versatile, this one has been tweaked to appeal to smallies. A small wire bait keeper has also been added to hold soft plastic trailers in place, without having to glue them on.

The video below will show you exactly what you need and will walk you through the entire process, showing you How to Tie a Peanut Head Smallmouth Jig.

Remember that the colors used in this video can be changed up to create the jig you think will work best on the lakes in your area.

Items used for this project:

If you enjoyed this post, please be sure to like it and share it with your friends.

If you’d like to learn how to wire tie a Jig skirt, click here.

And, as always, if you need any kind of lure-making supplies, be sure to visit our website, at http://lurepartsonline.com