How to Paint a Natural Perch Pattern Crankbait
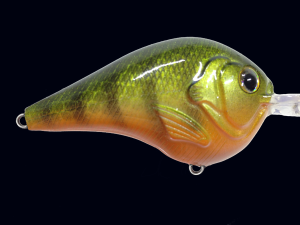 In our last blog post we showed you how to paint the Tiger Perch pattern. For this post, we’ll be showing you how to paint a natural perch pattern crankbait. Custom lure painter Michael Orensteen will be your instructor for today 🙂
It’s no secret that natural patterns on crankbaits catch fish like crazy. Natural-looking baits are more apt to get bites on pressured lakes where bass and other gamefish see a lot of lures. So with today’s tutorial you’ll be able to airbrush a natural perch pattern on your crankbait and make it look completely natural.
Michael says that the natural perch is one of his favorite patterns to paint. If it’s done properly, it’s quite easy to do, so let’s get started!
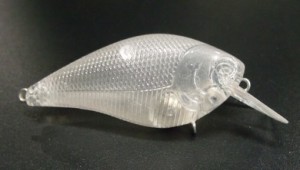 The first thing you’ll need to do is pick an unpainted crankbait body to paint. Once you’ve chosen the lure body, you’ll need to spray a white base coat on the body, as is done most of the time.
Once the white has been sprayed, the next step will be to apply a coat of pearl white. Using the pearl white gives the bait a slight glimmer, which helps to mimic the natural, subtle sheen that fish scales have underwater. Pearl will also help give the paint more depth.
In between paint layers, always be sure to heat set the paint with a hair dryer. It only takes a few seconds to do and helps to make sure that the paint dries thoroughly before another layer is applied.
Next, the top half of the bait is painted with a coat of pearlized lime green. Michael mentions that it’s always a good idea to shake this color up really good before using it, to be sure that the pearl is mixed well. It might even be necessary to thin it out a tiny bit to help the pearl flakes flow better through the airbrush.
Once the pearl lime has been sprayed onto the top half of the lure blank, the belly will be sprayed with a layer of transparent orange. Mike explains, during this part of the process, that he always prefers to spray a couple of light coats of paint rather than one heavy coat, regardless of what color he might be using.
And, again, don’t forget to heat set each layer of paint!
After spraying the second coat of orange on the belly, another shade of green is layered onto the back of the lure. This one is called Moss Green. As this layer is applied, you can really see the overall color pattern starting to take shape!
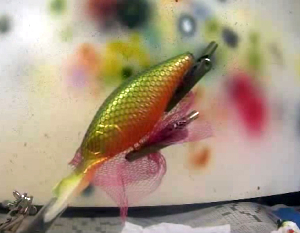
The next step will be to add scales to the bait, using scale netting. Be sure to have something available to hold the scale netting in place while you spray the paint on. Michael suggests using small alligator clips.
The scale pattern should be very light and not too strong, so the black paint used to spray the scales should be thinned out with paint reducer so that the black isn’t too dominant. It should be just enough to show the scale pattern. Keep in mind that the scale pattern should be sprayed only on the top section of the lure, not all the way down the sides.
After drying the scales with the hair dryer, the scale netting is removed and the scales become readily visible.
And now it’s time for the stripes, to make it look like a Perch.
As with the scales, the stripes should be subtle, so the pressure for the airbrush should be adjusted down to 12-15 PSI. This allows you to spray a light dusting of paint and create subtle vertical stripes on the sides of the lure.
Michael uses a comb as a mask to create the stripes. As always, he seems to find items that are common around the house to help produce the desired look and results. Watching him paint these lines using a comb is impressive, as he pulls the comb away and the stripes look natural.
Black is then sprayed along the back of the lure to darken it up a bit, helping to blend the stripes into the back of the lure. A little black is also sprayed around the eyes and on the nose.
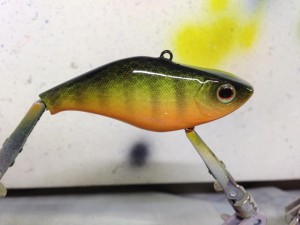 And the final painting step is to spray some white under the throat of the bait. This helps to give a little contrast with the other colors and make the lure look more natural, since most fish have white on their bellies.
The final steps for this project are to add your stick-on eyes and then your clear coat.
And that’s it! Let the lure dry thoroughly, for a minimum of 6-8 hours, add your hooks, split rings and line tie and go catch some fish!
Watch the video below.
Items used for this project:
Airbrush
Lure Paint
Unpainted Crankbait Body
Stick-on Lure Eyes
Treble Hooks
Split Rings
Oval Line Tie
If you enjoyed this post, please be sure to like it and share it with your friends.
And, as always, if you need any kind of lure-making supplies, be sure to visit our website, at http://lurepartsonline.com
To check out the Lure Me In Custom Painted Crankbaits Youtube channel, Click Here

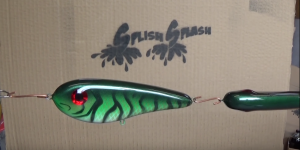 And the final step in spraying is to darken the back a bit more with black paint. Once the final layer of paint is applied and has dried thoroughly, a final topcoat of epoxy is applied and the lure is placed on a drying wheel while the epoxy hardens.
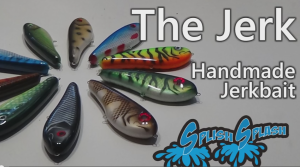 Today you’re going to learn how to make a balsa jerkbait from scratch.
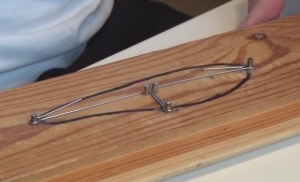 Next, it’s on to outfitting the lure body with a through-wire. To assist with making this easier, he has actually created a special wire bender to help shape the wire perfectly for the lure that’s being made. The video shows us the tool, so you can make one too, if you choose to do so. Using the through-wire construction, a one-piece connection is created for every piece of hardware on this bait.
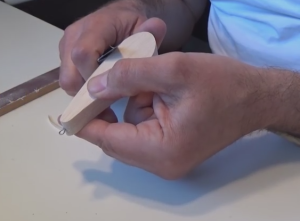 Now comes the fun part of shaping the lure to get it just right. The specs for the final thickness of the lure are found in the PDF file that we’ve linked to below. They are also mentioned in the video tutorial.
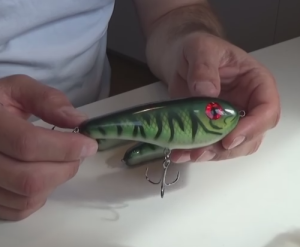 Painting can be done using several different methods; brush, airbrush, spray can or even some other way of applying the paint. For best results, an airbrush is recommended. But since this is your lure, you decide how to paint it!
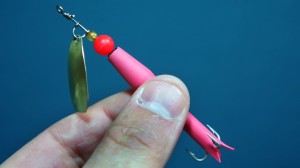 The Flying C Spinner is a fishing lure that’s been around for a very long time and has accounted for the catch of hundreds of thousands of fish!