Category Archives: Making Wooden Lures

Making Through Wire Musky Lures
Making Through Wire Musky Lures

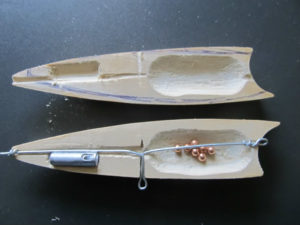
Making Through Wire Musky LuresMaking through wire musky lures is something that not a lot of people understand. But in order to make a musky lure that will endure the vicious strikes and severe punishment it will be subjected to, it’s pretty imperative that every lure used to catch musky be fitted with through wire construction.

We want to show you how making through wire musky lures can be done by even novice lure makers. We have a video below that will demonstrate this technique, step by step. Best of all, the lure maker in this video uses an oversized lure, to make it easier to see the details of what’s being done.

Why Through Wire Construction?

The objective behind through wire construction is to create lures that will last longer and stand up to extreme conditions. Musky lures are just one example. Another good example would be lures made to catch big striped bass, or even big Peacock Bass in South America.

When a lure uses through wire construction, it will be virtually impossible for a big fish to pull the hooks from the lure. It basically eliminates a point of failure by replacing screw eyes with heavy-duty twisted wire.

How Does it Work?

Through wire construction uses a solid piece of heavy wire that runs from the nose of the lure, through to the tail hook. Additionally, some lure makers run the wire from the nose to the belly. All in all, the wire aspects of the lure are pretty close to indestructible, at least by the fish.

through wire crankbait by Brandon Seutter

Here’s a great example of through wire construction on a smaller crankbait designed to catch bass.

On most baits, the wire in the nose acts as the line tie. The wire that exits the rear of the bait is the hook hanger for the rear hook. The wire is twisted to create hook attachments that will stand up to abuse. If the lure maker chooses to run a wire to the belly hook this will eliminate the need for a screw eye in the belly.

Why Not Use Screw Eyes?

Screw eyes work well under “normal” conditions. But under the extreme conditions created by large muskies, a screw eye would more than likely be yanked from the lure body after just a few fish.

Some lure makers like to use epoxy to hold their screw eyes in place. And this is a great idea, but it still won’t create an attachment point strong enough to stand up to hooking, fighting and landing several good muskies or other large gamefish.

The Actual Process of Making Through Wire Musky Lures

Now it’s time to put theory behind us and get to work with the actual process of making through wire musky lures. Because this process has a few different steps, we have included three different videos below. These three videos cover the process pretty thoroughly.

In the first video below you will be shown how to run the wire through the body of your lure.

The second video shows how to drill through the center of your wood lure body, creating a path for your wire to run through.

The third video will show you how to twist your wire to create the loops necessary to hold the hooks and tie your line to. You will also learn how to bend the wire in a way that is sure to hold the hooks in place, even under the most demanding conditions.

We’ve also included a 4th video that shows a couple other methods for wiring a wood lure.

How to drill a hole through the center of your lure.

How to Make a Tail Loop in Your Wire

Wiring a Wooden Lure

Items used for this project:

If you enjoyed this post, please be sure to like it and share it with your friends.

And, as always, if you need any kind of lure-making supplies, be sure to visit our website, at http://lurepartsonline.com

Making a Wood Trout Glide Bait

Making a Wood Trout Glide Bait

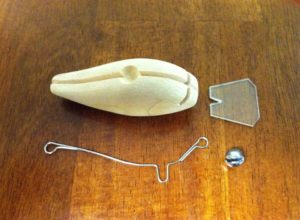
Making a Wood Trout Glide BaitMaking a wood trout glide bait is a great way to handcraft a lure that will catch a variety of gamefish. With a glide bait you can expect to catch Largemouth and Smallmouth Bass, Northern Pike and Musky. It can also be used for other large freshwater fish around the globe.

And making the lure yourself gives you the satisfaction of catching fish on something that you created, not just something bought from the shelves of a retail store or online shop. That alone makes it worth spending the time making a wood trout glide bait.

Lure maker Paul Adams is today’s instructor. Paul has been making homemade lures for many years and always presents a great tutorial.

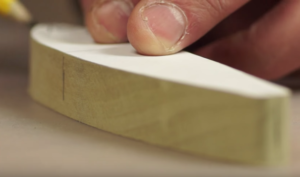
Shaping the Trout Glide BaitPaul starts out by showing us how he shapes his initial piece of wood. He draws out the desired shape on his wood material, using a paper template. Then he cuts it on a band saw. He then refines it a bit, using pencil marks and some sanding.

Paul then uses a craft knife to carve the square edges off the body. This gives it rounded edges, to more closely resemble the body of a trout.

You’ll notice that a bit of sanding to further shape and smooth the wood lure body helps bring it even closer to the finished shape. As Paul works with the sandpaper, it gives the lure a smooth surface texture that’s close to being ready for painting.

Once the desired shape is achieved, then it’s time to start working on other details, such as eye sockets, holes for screw eyes and larger holes for weights to be inserted into the belly of the lure.

Creating The Details

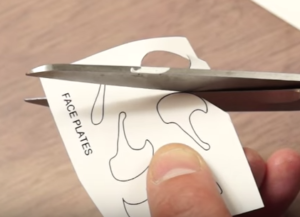
Trout Glide Bait Face PlatesPaul goes into great detail about how he creates the facial details of the trout, using more paper stencils, double-sided tape and epoxy. The results of this are impressive, as they give the face area of the lure a 3-dimensional realism.

At first this might seem like overkill and unnecessary. But as Paul progresses, the finished result shows that the extra work is well worth the effort!

Next, it’s time for some textured foil to be applied to the sides of the lure. This adds a very light scale look and will create more realism under the paint that is yet to be sprayed on.

And then it’s time for paint and the first coat of epoxy to be applied. And after letting it dry until the epoxy is tacky, a final coat of epoxy is applied. The lure is then left to dry for approximately 24 hours.

Paul is careful to use small amounts of heat on the epoxy finish shortly after brushing it on, to prevent bubbles from forming as the lure dries.

Trout Glide Bait - Paul with FishAnd, finally, it’s time to add the final hardware, such as screw eyes and hooks, and give the lure a test with some fish! And as you can see, Paul’s first fishing trip with his new lure was a success πŸ™‚

Now, it’s time to go ahead and watch Paul walk through all of these steps in the video tutorial he created.


Enjoy the video!

Items used for this project:

If you enjoyed this post, please be sure to like it and share it with your friends.

And, as always, if you need any kind of lure-making supplies, be sure to visit our website, at http://lurepartsonline.com
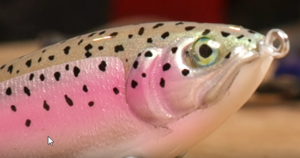
Building a Rattle Chamber in a Wooden Fishing Lure

Building a Rattle Chamber in a Wooden Fishing Lure

Building a Rattle Chamber in a Wooden Fishing LureBuilding a rattle chamber in a wooden fishing lure is the best way to overcome the lack of sound in most wooden fishing lures.

Despite being incredible fish catchers, most wooden lures lack the ability to make any kind of rattling or clicking sound. This is due to the fact that wooden lure bodies are inherently solid. They have no natural chambers in which to place rattles.

This tutorial will show you how to overcome that problem by building a rattle chamber in a wooden fishing lure. This will set your wooden lures apart from others by adding an internal rattle. Rattles can sometimes mean the difference between catching or not catching fish.

This method requires some tools, which are listed in the video below. And always be sure to use the appropriate safety gear and work methods to prevent injury!

You’ll need a few parts and components for this project. We’ve listed them at the very end of this article.

As with any project like this, watch the video and learn the method from a proven, experienced lure maker. Kermett Adams has been doing this for a very long time and makes some beautiful lures that catch big fish.

But don’t be afraid to experiment a little and improvise to come up with new ideas that might work better for you. You never know if something will work until you try it yourself πŸ™‚

Enjoy the video.

Items used for this project:

If you enjoyed this post, please be sure to like it and share it with your friends.

And, as always, if you need any kind of lure-making supplies, be sure to visit our website, at http://lurepartsonline.com

Make a Homemade Walking Topwater Bait

Make a Homemade Walking Topwater Bait

Learn how to make a homemade walking topwater bait, similar to the Zara Spook Puppy in the tutorial below.

Make a Homemade Walking Topwater BaitZara Spooks and other walking topwater lures have been around for decades. They have have accounted for some giant bass over the years. There’s something about that cigar-shaped body zig-zagging back and forth across the surface of the water that big bass and other gamefish just can’t pass up.
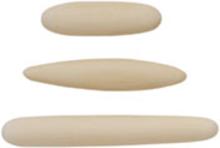
So in light of their popularity, it’s not a bad idea to have a few of them in your tackle box so you can use them to catch some big fish too πŸ™‚

Choosing to make a homemade walking topwater bait will give you lots of flexibility when it comes to sizes and colors of the baits you can use on different lakes. It will save you money when compared to buying factory-made baits. And due to its cigar shape, this is probably one of the easiest lures to make yourself.

For material, you will need some kind of wood piece. You can start with a wood block and carve the lure shape by hand. Or you can work it on a wood lathe, which is what is shown in the video below. You can even start with a good old fashioned wooden broomstick handle.

Wood Surface Lure BodiesIf you want to avoid all of the carving or the lathe work, you can also use a pre-carved wood body. We’ve provided a link to them below the video. You can also click on the photo to the left. Using a wood lure blank that’s already been shaped for you eliminates most of the hard stuff. It allso allows you to just paint the lure and assemble it.

Either way, whether you choose to build the lure 100% from scratch or use some pre-carved parts, you will have the versatility of creating the lure exactly the way you want it to be. And catching fish on a homemade lure is always much more satisfying than catching them on a factory lure πŸ™‚

One last advantage to making your own lures is that it gives you the opportunity to tinker and experiment with your lure design. This allows you to test new ideas and maybe come up with something that can’t be bought in store.

So get ready to take a few notes and learn from the video.

Enjoy your new homemade topwater lure!

One side note about this project. The lure maker in the video used screw eyes that were considerably bigger than those used by the factory. Please be advised that using screw eyes that are too big will seriously alter the action of the lure.

We recommend using screw eyes that are as close as possible to the size used by the factory on the original lure πŸ˜‰

Items used for this project:

If you enjoyed this post, please be sure to like it and share it with your friends.

And, as always, if you need any kind of lure-making supplies, be sure to visit our website, at http://lurepartsonline.com

How To Make a Topwater Bass Popper

How To Make a Topwater Bass Popper

How To Make a Topwater Bass PopperWant to learn how to make a topwater bass popper? We have a great tutorial video for you right here.
The topwater bass popper has been around for a very long time. This type of topwater lure has caught countless numbers of bass over the decades. It’s safe to say that it’s probably one of the most popular topwater lures for catching bass with, no matter what part of the world you’re located in.

This tutorial will show you how to make a topwater bass popper, step by step.

Let’s get started!

The first thing you’ll need is a piece of wood material that will be used to make the actual popper lure body. The video suggests using a wood dowel. China hardwood is recommend for its ease in carving, vs. oak.

The first step will be to cut the dowel rod into pieces that are 2 7/8 or 3 inches inches in length, whichever you prefer. And once you’ve cut your pieces to the desired length, grab the one that you’ll be using to make a your first popper.

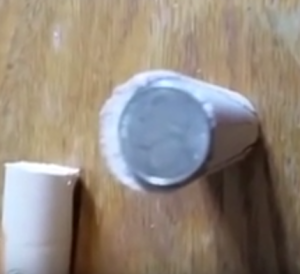
Place a nickel on top of dowel rodStand the piece upright and place a nickel on the top end, offset so that the nickel touches one side of the circumference, but not the other.

Once you’ve done this, trace around the outside of the nickel with a pencil. This outline will give you a pattern for the front of the popper.

Next, you’ll trace out the tail end of the popper, using a pencil eraser. Move the edge of the pencil eraser to the outside edge of the wood dowel, being sure to line it up with the marks that were created on the other end, using the nickel.

Lines will then need to be drawn down the length of the dowel to create the outline that will be used to shape the body into a popper shape. Material inside of this outline will not be carved away. This also defines the bottom of the lure, where screw eyes will be added, to hold the hooks later on.

Time to start carving our popper lure bodyNow we’ll start the actual carving, using a utility knife, or something similar.

Start by carving from the top of the lure (the large end), toward the bottom end. Remove small amounts of material at a time. This prevents mistakes that will be irreversible.

Once the top end of the popper is carved, it’s time to move down and carve the smaller end, for the tail of the lure.

Carving doesn’t have to be precise if you don’t want it to be. Your goal is to obtain the basic shape of the popper. You don’t need to be concerned with creating a perfectly smooth surface if you don’t want to.

If you choose to forego sanding and perfecting of the lure’s surface, the next step will be to form the mouth of the popper, which will allow it to pop and gurgle when the bait is twitched or “popped” on the surface.

This part of the project is accomplished with a Dremel, using a small sanding tip. The idea here is to create an angled shape on the front of the lure. Once the initial angle is created, the face of the popper can then be hollowed out, to create a concave surface.

Once the face of the lure is shaped to your satisfaction, it’s time to give your lure some personality, with paint!

In the video tutorial, the luremaker suggests using Sharpie or other permanent markers to create the color pattern you want. While this is OK to do, it doesn’t give the lure a finished look, the way paint would. But it’s ultimately up to you to decide if you want it to look great, or just catch fish πŸ™‚

Once the color is applied, whether it’s been painted or colored with Sharpie markers, it’s time to add the screw eyes. You’ll need 3 screw eyes total. One is for the rear hook, one for the center hook and one on the front of the lure, which will be your line tie.

When placing the screw eyes on the bottom of the lure, be sure to place them far enough apart to prevent the hooks from catching on each other!

After placing the screw eyes, it’s time to seal the lure, to prevent water from getting into the wood body and ruining your lure. The luremaker uses good old urethane, but we recommend using an epoxy topcoat, for the sake of durability.

The video explains the remaining few steps left to finish your lure, including good info on what treble hooks to use.

We hope you’ve enjoyed learning how to make a topwater bass popper. Have fun making your new poppers and enjoy catching bass on them!

Here’s the video tutorial.

If you prefer to use a wood popper body that’s already been shaped for you, click here.

Items used for this project:

Wood Popper Bodies (in case you don’t want to carve your own)
Lure Eyes
Split Rings
Round Bend Treble Hooks
Screw Eyes
Epoxy Top Coat
Quick Coat Permanent Lure Markers

If you enjoyed this post, please be sure to like it and share it with your friends.

And, as always, if you need any kind of lure-making supplies, be sure to visit our website, at http://lurepartsonline.com