Making Through Wire Musky Lures
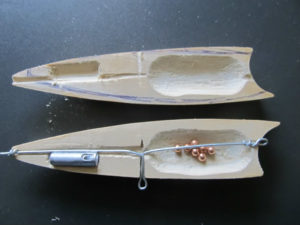
Making Through Wire Musky Lures

Making Through Wire Musky LuresMaking through wire musky lures is something that not a lot of people understand. But in order to make a musky lure that will endure the vicious strikes and severe punishment it will be subjected to, it’s pretty imperative that every lure used to catch musky be fitted with through wire construction.

We want to show you how making through wire musky lures can be done by even novice lure makers. We have a video below that will demonstrate this technique, step by step. Best of all, the lure maker in this video uses an oversized lure, to make it easier to see the details of what’s being done.

Why Through Wire Construction?

The objective behind through wire construction is to create lures that will last longer and stand up to extreme conditions. Musky lures are just one example. Another good example would be lures made to catch big striped bass, or even big Peacock Bass in South America.

When a lure uses through wire construction, it will be virtually impossible for a big fish to pull the hooks from the lure. It basically eliminates a point of failure by replacing screw eyes with heavy-duty twisted wire.

How Does it Work?

Through wire construction uses a solid piece of heavy wire that runs from the nose of the lure, through to the tail hook. Additionally, some lure makers run the wire from the nose to the belly. All in all, the wire aspects of the lure are pretty close to indestructible, at least by the fish.

through wire crankbait by Brandon Seutter

Here’s a great example of through wire construction on a smaller crankbait designed to catch bass.

On most baits, the wire in the nose acts as the line tie. The wire that exits the rear of the bait is the hook hanger for the rear hook. The wire is twisted to create hook attachments that will stand up to abuse. If the lure maker chooses to run a wire to the belly hook this will eliminate the need for a screw eye in the belly.

Why Not Use Screw Eyes?

Screw eyes work well under “normal” conditions. But under the extreme conditions created by large muskies, a screw eye would more than likely be yanked from the lure body after just a few fish.

Some lure makers like to use epoxy to hold their screw eyes in place. And this is a great idea, but it still won’t create an attachment point strong enough to stand up to hooking, fighting and landing several good muskies or other large gamefish.

The Actual Process of Making Through Wire Musky Lures

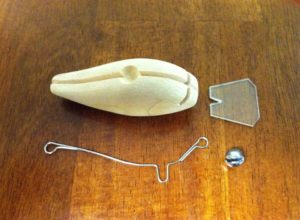
Now it’s time to put theory behind us and get to work with the actual process of making through wire musky lures. Because this process has a few different steps, we have included three different videos below. These three videos cover the process pretty thoroughly.

In the first video below you will be shown how to run the wire through the body of your lure.

The second video shows how to drill through the center of your wood lure body, creating a path for your wire to run through.

The third video will show you how to twist your wire to create the loops necessary to hold the hooks and tie your line to. You will also learn how to bend the wire in a way that is sure to hold the hooks in place, even under the most demanding conditions.

We’ve also included a 4th video that shows a couple other methods for wiring a wood lure.

How to drill a hole through the center of your lure.

How to Make a Tail Loop in Your Wire

Wiring a Wooden Lure

Items used for this project:

If you enjoyed this post, please be sure to like it and share it with your friends.

And, as always, if you need any kind of lure-making supplies, be sure to visit our website, at http://lurepartsonline.com

Please share!

How to Tie Your Own Walleye Spinner Rigs

How to Tie Your Own Walleye Spinner Rigs

How to Tie Your Own Walleye Spinner RigsIf you fish for Walleye, you’ll want to learn How to Tie Your Own Walleye Spinner Rigs. Walleye are one of the most sought after gamefish species in many regions of the world.

Walleye are known for their great taste on the table and their prowess as a predator fish.

As with most gamefish, there are many ways to catch Walleye. Some people prefer to use live bait, while others like artificial lures.

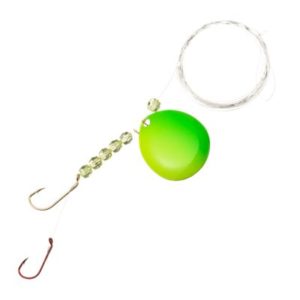
Another method combines the two, using an artificial lure tipped with live bait. The spinner rig featured in this article is one such lure. It comprises spinner blades and plastic beads, while allowing for worms, night crawlers or minnows to be used for added attraction.

In today’s video, an avid Walleye angler demonstrates How to Tie Your Own Walleye Spinner Rigs. Making your own rigs not only saves you cash, but it also means you can create the custom colors and combinations you want. You’re no longer limited by what’s available on the shelves of your local tackle shop. Instead, your imagination is the only limit on what you can make.

The process of tying Your Own Walleye Spinner Rigs is pretty simple and straight forward. The trickiest part is probably tying the knots, but that’s demonstrated really well in the video below.

What’s even better is that there are no tools required to make these, with the exception of a pair of nail clippers. So you won’t need to go digging through your toolbox to find any special tools.

Items used for this project:

If you enjoyed this post, please be sure to like it and share it with your friends.

And, as always, if you need any kind of lure-making supplies, be sure to visit our website, at http://lurepartsonline.com
Please share!

Custom Painting a Bluegill Crankbait

Custom Painting a Bluegill Crankbait

Custom Painting a Bluegill CrankbaitIn the bass fishing world, the Bluegill pattern is one of the most popular crankbait patterns sold everywhere. That’s why Custom Painting a Bluegill Crankbait is a critical skill to learn if you want to sell your lures to others. Bluegill patterns flat out catch fish!
In today’s blog post we will be featuring a video lure painting tutorial from Michael Orensteen. Michael has been custom painting crankbaits and other hard body lures for quite a while now. His persistence at constantly learning new techniques, and improving his skill set has caused him to become very good at what he does!

So today he will be sharing his tips and tricks for Custom Painting a Bluegill Crankbait. Michael states right up front that painting this particular pattern isn’t nearly as hard as it looks. So, to back that claim, he shows us what it takes.

Michael does a great job of explaining how to start with a base coat and then use layers of color for a realistic look. It’s important to remember that nothing in nature is perfect. So trying to achieve perfection in your lure paint scheme isn’t necessary.

One other important point that Michael makes is that the tutorials are meant to teach methods, but not to encourage outright copying or duplication. It’s best to learn techniques and then use your imagination and experiment with variations to see what you come up with yourself.

Bluegills may look different in your area than they do in another region. So always keep that in mind when trying to mimic the natural baitfish in your area lakes, ponds and rivers. And remember that your lure isn’t going to be sitting still for the bass to examine closely. So triggering a bite is the most important thing you want to accomplish.

As always, we’ve included a list of items needed to create this type of bait and color pattern.

Enjoy the video and please be sure to share this blog post if you find it helpful!

Items used for this project:

If you enjoyed this post, please be sure to like it and share it with your friends.

And, as always, if you need any kind of lure-making supplies, be sure to visit our website, at http://lurepartsonline.com

Please share!

Make a Simple Inline Spinner From a Kit

Make a Simple Inline Spinner From a Kit

Make a Simple Inline Spinner From a KitIf you make a simple inline spinner from a kit, you’ve just made one of the best fish catchers known to man! And because you made it from a kit, you didn’t have to shop around for lots of different parts.
Lure making kits are the cheapest and easiest way to start making your own lures. When you buy a lure making kit, you’re getting everything you need to make a fair number of lures, all in one box.

We all know that catching a fish on a lure you made yourself is one of the most satisfying aspects of fishing. Catching fish is fun. But catching fish on homemade lures is truly exciting in a way that can’t be explained.

If you were to set out to make your own inline spinners without buying a kit, you’d have to buy several different components, in various sizes and colors just to get started. That can be a bit intimidating when you’re first starting out.

But if you want to make a simple inline spinner from a kit, all of the preliminary homework has been done for you. Lure making kits are great because they include everything you need, without you having to do a lot of research and leg work tracking down the various lure parts.

All you need to do is look through your kit and pick out the parts you want to use for your new spinner. Once you do that, the rest is just a matter of assembling those parts and then going out and catching some fish!

Below you’ll find a great video tutorial that shows you each step needed to make a simple inline spinner from a kit. The tutorial is clear and concise. Best of all, it takes less than 5 minutes from start to finish!

So go ahead and grab your kit, along with a pair of pliers and wire cutters, and you’re ready to go! And, as always, you’ll find a list of needed items below the video.

Items used for this project:

If you enjoyed this post, please be sure to like it and share it with your friends.

And, as always, if you need any kind of lure-making supplies, be sure to visit our website, at http://lurepartsonline.com

Please share!

Painting a Pike Pattern Lure

Painting a Pike Pattern Lure

Painting a Pike Pattern LurePainting a pike pattern lure isn’t something that too many lure painters or lure makers talk about. Most people tend to stick to the more popular patterns, such as bluegills, baby bass and perch.
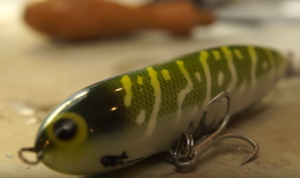
But in areas where Pike are the prevalent gamefish, it makes perfect sense to create a lure that mimics a juvenile Northern Pike. So painting a pike pattern lure is something that lure makers for those parts of the world should learn.

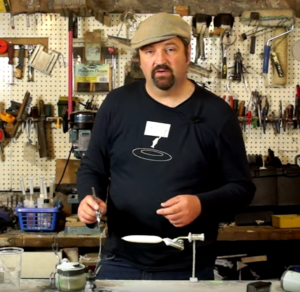
Once again, today’s tutorial presenter is Paul Adams. Paul has been at this craft for a long time and has created a great video showing that painting a pike pattern lure isn’t as difficult as some might think.

So let’s get started!

Paul starts off with a Zara Spook lure body that he made from a broom handle. He has held a contest and will be painting this lure for the winner of that contest. Paul even throws in a bit of personalization for the proud winner by adding decals to the lure.Paul Adams Preparing to Paint a Pike Pattern on a Lure

Paul explains that he has given the lure two coats of 5-minute epoxy to seal the wood lure body and protect it from moisture. @ coats of white primer are then sprayed on as a base coat.

He then goes on to spray the lure body with some black acrylic ink called Liquitex. The black is used as a foundation for the remainder of the paint work. Using black prevents the white from showing through when he starts using shades of green.

Paul alternates between his airbrush and a hair dryer, making sure to keep the ink drying quickly so as to prevent any problems with it running or sagging. The black is sprayed on the entire lure body, with the exception of the belly area.

And then it’s time to start making it look more like a baby pike!

Now it’s time to put some special “tools” to use. First up is a piece of scale netting that will be used to paint the scale pattern on the lure body. This effect adds a lot of realism to the lure. White paint is used for this. And the white paint gets thinned down to prevent the scales from being too overpowering.

Scales have to be sprayed on very lightly. The paint should dry almost immediately upon hitting the surface of the lure blank. Once again, a hair dryer can be used to speed up the drying process, if needed.

After the white scales are completed, it’s time for some gold scales. And using a hair dryer to speed up the drying process is a good idea. Once everything has dried completely, then the scale netting can be removed.

More paint is sprayed onto the back and sides of the lure. This time it’s a green color. This paint is sprayed lightly and it is fairly transparent. So it allows the previously painted scales to continue to show through.

Black is then sprayed on the back of the lure and in the area where the eyes will be located. And then some more white is sprayed onto the belly area to clean things up a bit. This is necessary due to the fact that all of the other spraying kind of overlaps in the belly area and doesn’t look quite as nice as it could.

Now it’s time to grab a white acrylic marker and draw some stripes on the side of the lure. This helps mimic more accurately the coloring of a juvenile pike, versus an adult pike. And then it’s time to spray on the eyes. This is done using a piece of plastic with holes punched in it.

There are still a few minor steps left to complete this lure. But we’ll let Paul show you in the video below.

Enjoy!

Items used for this project:

If you enjoyed this post, please be sure to like it and share it with your friends.

And, as always, if you need any kind of lure-making supplies, be sure to visit our website, at http://lurepartsonline.com

Please share!