Author Archives: Lure Parts Online

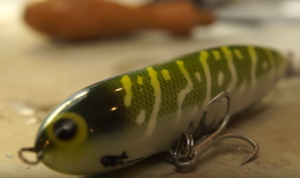
Painting a Pike Pattern Lure
Painting a Pike Pattern Lure

Painting a Pike Pattern LurePainting a pike pattern lure isn’t something that too many lure painters or lure makers talk about. Most people tend to stick to the more popular patterns, such as bluegills, baby bass and perch.

But in areas where Pike are the prevalent gamefish, it makes perfect sense to create a lure that mimics a juvenile Northern Pike. So painting a pike pattern lure is something that lure makers for those parts of the world should learn.

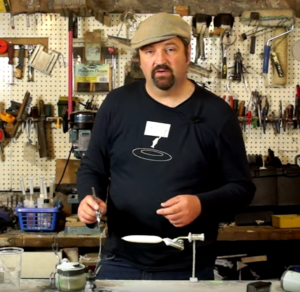
Once again, today’s tutorial presenter is Paul Adams. Paul has been at this craft for a long time and has created a great video showing that painting a pike pattern lure isn’t as difficult as some might think.

So let’s get started!

Paul starts off with a Zara Spook lure body that he made from a broom handle. He has held a contest and will be painting this lure for the winner of that contest. Paul even throws in a bit of personalization for the proud winner by adding decals to the lure.Paul Adams Preparing to Paint a Pike Pattern on a Lure
Paul explains that he has given the lure two coats of 5-minute epoxy to seal the wood lure body and protect it from moisture. @ coats of white primer are then sprayed on as a base coat.

He then goes on to spray the lure body with some black acrylic ink called Liquitex. The black is used as a foundation for the remainder of the paint work. Using black prevents the white from showing through when he starts using shades of green.

Paul alternates between his airbrush and a hair dryer, making sure to keep the ink drying quickly so as to prevent any problems with it running or sagging. The black is sprayed on the entire lure body, with the exception of the belly area.

And then it’s time to start making it look more like a baby pike!

Now it’s time to put some special “tools” to use. First up is a piece of scale netting that will be used to paint the scale pattern on the lure body. This effect adds a lot of realism to the lure. White paint is used for this. And the white paint gets thinned down to prevent the scales from being too overpowering.

Scales have to be sprayed on very lightly. The paint should dry almost immediately upon hitting the surface of the lure blank. Once again, a hair dryer can be used to speed up the drying process, if needed.

After the white scales are completed, it’s time for some gold scales. And using a hair dryer to speed up the drying process is a good idea. Once everything has dried completely, then the scale netting can be removed.

More paint is sprayed onto the back and sides of the lure. This time it’s a green color. This paint is sprayed lightly and it is fairly transparent. So it allows the previously painted scales to continue to show through.

Black is then sprayed on the back of the lure and in the area where the eyes will be located. And then some more white is sprayed onto the belly area to clean things up a bit. This is necessary due to the fact that all of the other spraying kind of overlaps in the belly area and doesn’t look quite as nice as it could.

Now it’s time to grab a white acrylic marker and draw some stripes on the side of the lure. This helps mimic more accurately the coloring of a juvenile pike, versus an adult pike. And then it’s time to spray on the eyes. This is done using a piece of plastic with holes punched in it.

There are still a few minor steps left to complete this lure. But we’ll let Paul show you in the video below.

Enjoy!

Items used for this project:

If you enjoyed this post, please be sure to like it and share it with your friends.

And, as always, if you need any kind of lure-making supplies, be sure to visit our website, at http://lurepartsonline.com

Making a Wood Trout Glide Bait

Making a Wood Trout Glide Bait

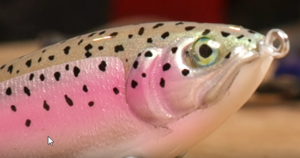
Making a Wood Trout Glide BaitMaking a wood trout glide bait is a great way to handcraft a lure that will catch a variety of gamefish. With a glide bait you can expect to catch Largemouth and Smallmouth Bass, Northern Pike and Musky. It can also be used for other large freshwater fish around the globe.
And making the lure yourself gives you the satisfaction of catching fish on something that you created, not just something bought from the shelves of a retail store or online shop. That alone makes it worth spending the time making a wood trout glide bait.

Lure maker Paul Adams is today’s instructor. Paul has been making homemade lures for many years and always presents a great tutorial.

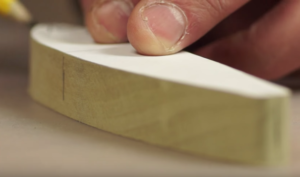
Shaping the Trout Glide BaitPaul starts out by showing us how he shapes his initial piece of wood. He draws out the desired shape on his wood material, using a paper template. Then he cuts it on a band saw. He then refines it a bit, using pencil marks and some sanding.
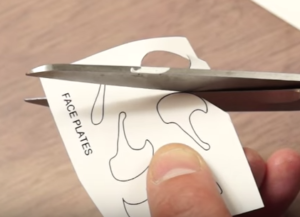
Paul then uses a craft knife to carve the square edges off the body. This gives it rounded edges, to more closely resemble the body of a trout.

You’ll notice that a bit of sanding to further shape and smooth the wood lure body helps bring it even closer to the finished shape. As Paul works with the sandpaper, it gives the lure a smooth surface texture that’s close to being ready for painting.

Once the desired shape is achieved, then it’s time to start working on other details, such as eye sockets, holes for screw eyes and larger holes for weights to be inserted into the belly of the lure.

Creating The Details

Trout Glide Bait Face PlatesPaul goes into great detail about how he creates the facial details of the trout, using more paper stencils, double-sided tape and epoxy. The results of this are impressive, as they give the face area of the lure a 3-dimensional realism.

At first this might seem like overkill and unnecessary. But as Paul progresses, the finished result shows that the extra work is well worth the effort!

Next, it’s time for some textured foil to be applied to the sides of the lure. This adds a very light scale look and will create more realism under the paint that is yet to be sprayed on.

And then it’s time for paint and the first coat of epoxy to be applied. And after letting it dry until the epoxy is tacky, a final coat of epoxy is applied. The lure is then left to dry for approximately 24 hours.

Paul is careful to use small amounts of heat on the epoxy finish shortly after brushing it on, to prevent bubbles from forming as the lure dries.

Trout Glide Bait - Paul with FishAnd, finally, it’s time to add the final hardware, such as screw eyes and hooks, and give the lure a test with some fish! And as you can see, Paul’s first fishing trip with his new lure was a success πŸ™‚

Now, it’s time to go ahead and watch Paul walk through all of these steps in the video tutorial he created.


Enjoy the video!

Items used for this project:

If you enjoyed this post, please be sure to like it and share it with your friends.

And, as always, if you need any kind of lure-making supplies, be sure to visit our website, at http://lurepartsonline.com

Building a Rattle Chamber in a Wooden Fishing Lure

Building a Rattle Chamber in a Wooden Fishing Lure

Building a Rattle Chamber in a Wooden Fishing LureBuilding a rattle chamber in a wooden fishing lure is the best way to overcome the lack of sound in most wooden fishing lures.

Despite being incredible fish catchers, most wooden lures lack the ability to make any kind of rattling or clicking sound. This is due to the fact that wooden lure bodies are inherently solid. They have no natural chambers in which to place rattles.

This tutorial will show you how to overcome that problem by building a rattle chamber in a wooden fishing lure. This will set your wooden lures apart from others by adding an internal rattle. Rattles can sometimes mean the difference between catching or not catching fish.

This method requires some tools, which are listed in the video below. And always be sure to use the appropriate safety gear and work methods to prevent injury!

You’ll need a few parts and components for this project. We’ve listed them at the very end of this article.

As with any project like this, watch the video and learn the method from a proven, experienced lure maker. Kermett Adams has been doing this for a very long time and makes some beautiful lures that catch big fish.

But don’t be afraid to experiment a little and improvise to come up with new ideas that might work better for you. You never know if something will work until you try it yourself πŸ™‚

Enjoy the video.

Items used for this project:

If you enjoyed this post, please be sure to like it and share it with your friends.

And, as always, if you need any kind of lure-making supplies, be sure to visit our website, at http://lurepartsonline.com

Make a Homemade Walking Topwater Bait

Make a Homemade Walking Topwater Bait

Learn how to make a homemade walking topwater bait, similar to the Zara Spook Puppy in the tutorial below.

Make a Homemade Walking Topwater BaitZara Spooks and other walking topwater lures have been around for decades. They have have accounted for some giant bass over the years. There’s something about that cigar-shaped body zig-zagging back and forth across the surface of the water that big bass and other gamefish just can’t pass up.
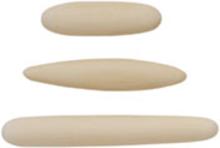
So in light of their popularity, it’s not a bad idea to have a few of them in your tackle box so you can use them to catch some big fish too πŸ™‚

Choosing to make a homemade walking topwater bait will give you lots of flexibility when it comes to sizes and colors of the baits you can use on different lakes. It will save you money when compared to buying factory-made baits. And due to its cigar shape, this is probably one of the easiest lures to make yourself.

For material, you will need some kind of wood piece. You can start with a wood block and carve the lure shape by hand. Or you can work it on a wood lathe, which is what is shown in the video below. You can even start with a good old fashioned wooden broomstick handle.

Wood Surface Lure BodiesIf you want to avoid all of the carving or the lathe work, you can also use a pre-carved wood body. We’ve provided a link to them below the video. You can also click on the photo to the left. Using a wood lure blank that’s already been shaped for you eliminates most of the hard stuff. It allso allows you to just paint the lure and assemble it.

Either way, whether you choose to build the lure 100% from scratch or use some pre-carved parts, you will have the versatility of creating the lure exactly the way you want it to be. And catching fish on a homemade lure is always much more satisfying than catching them on a factory lure πŸ™‚

One last advantage to making your own lures is that it gives you the opportunity to tinker and experiment with your lure design. This allows you to test new ideas and maybe come up with something that can’t be bought in store.

So get ready to take a few notes and learn from the video.

Enjoy your new homemade topwater lure!

One side note about this project. The lure maker in the video used screw eyes that were considerably bigger than those used by the factory. Please be advised that using screw eyes that are too big will seriously alter the action of the lure.

We recommend using screw eyes that are as close as possible to the size used by the factory on the original lure πŸ˜‰

Items used for this project:

If you enjoyed this post, please be sure to like it and share it with your friends.

And, as always, if you need any kind of lure-making supplies, be sure to visit our website, at http://lurepartsonline.com

Tricks to Make Your Buzzbaits Catch More Fish

Tricks to Make Your Buzzbaits Catch More Fish

Tricks to Make Your Buzzbaits Catch More FishWant to learn some Tricks to Make Your Buzzbaits Catch More Fish?

Buzzbaits are one of the most exciting lures used to catch bass. And when the buzzbait bite is hot, some of the biggest bass in the lake can be caught by chunking a buzzbait.

But, no matter what kind of buzzbait you throw, whether you made it yourself or bought it in a retail package, there are always ways to make them catch more fish. Today we’re going to show you some of the best tips and tricks to make this happen.

First, did you realize that buzzbaits should be broken in before you use them? Absolutely! This is pretty easy to do, a couple of different ways. The first way is to simply hold the buzzbait out the window as you drive to the lake. This isn’t the safest way to do it, since it takes your attention off of your driving.

The best way to do it, without worrying about getting distracted, is to use a plastic tie wrap to attach the buzzbait to your car or truck antenna and then leave it there while you drive. This lets the blade spin in the wind, wearing the blade and rivet in and causing them to squeak loudly on the retrieve.

One of the easiest tricks to make your buzzbaits catch more fish is to use a good pair of pliers to squeeze the rivet and crimp it down on the top wire shaft. Slide the rivet all the way to the back end of the wire and crimp it down as tightly as you can.

Now, with that rivet stationary, there will be plenty of friction between the rivet and the buzzbait blade. This will create a squeaking noise that will attract more fish and trigger more strikes! And the more you use your buzzbait, the louder that squeak will get πŸ™‚

These are just a couple of the easiest tricks to make your buzzbaits catch more fish. There are a few more in the video below, so be sure to give it a watch.

And the next time you make new buzzbaits, or even if you buy a new one, be sure to use these great modifications to squeeze more bites out of your buzzbait and put more fish in your boat!

Enjoy the video.

Items used for this project:

If you enjoyed this post, please be sure to like it and share it with your friends.

And, as always, if you need any kind of lure-making supplies, be sure to visit our website, at http://lurepartsonline.com