Make Bass Jigs That Catch More Fish
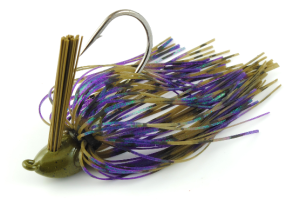
Make Bass Jigs That Catch More Fish

Make bass jigs that catch more fishToday’s blog post will share tips to help you make bass jigs that catch more fish.

It’s no secret that jigs are a proven big bass catcher. They just plain work!

But, as with any other lure, certain modifications or tweaks can make them work even better than they do right out of the package. So today we’ll show you some of those tips so you can make your own jigs work better, or modify jigs that you’ve made or bought in the past to catch more fish.

Keep in mind that conditions on any lake can change daily, or even from hour to hour, so what works today might not even get a bite tomorrow. But having a good selection of jigs in varying colors, sizes and styles can help you overcome those times when the bite slows down.

So what does it take to make bass jigs that catch more fish?

Really, it only takes a handful of your homemade bass jigs and a few very basic tools. First, you’ll need some freshly made bass jigs. If you haven’t started making your own jigs yet, then grab some new ones that you bought.
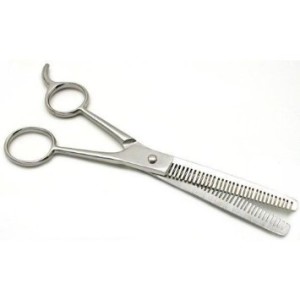
Thinning Shears for Trimming Your Jig SkirtNext, you’ll need a good pair of scissors. They don’t have to be expensive. They just need to be nice and sharp! You’ll also need a pair of cheap thinning shears. These are like the ones that are used to thin a person’s hair at the barber shop or salon. These can be bought inexpensively at your local department store, usually in the health and beauty section.

Once you have those items, you’re ready to start tweaking your jigs!

Let’s make it clear that there are many ways you can modify your jigs. You don’t necessarily have to follow anyone’s recommendations. You can definitely think outside the box with this. The tips in the video below, though, are offered by someone who has proven them during their own fishing trips, over many years. They work for him. So it’s pretty likely they will work for you, too.
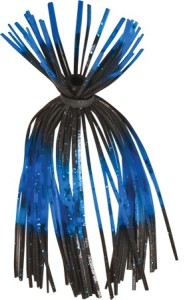
Buzz cut finesse skirtAnother thing to keep in mind is that you can also purchase skirts that are semi-tailored or tweaked already. The finesse jig that was created in the video can also be made by using a skirt that’s already cut the very same way right from the factory.

Using these skirts will save you a ton of trial and error. It will also eliminate the possibility of you accidentally destroying any of your good jig skirts while you try to learn to trim them yourself.

On the other hand, though, if you learn to make your own skirt modifications, the sky is the limit when it comes to the number of different ways you can customize your jigs.

It’s entirely up to you! But no matter which you choose, you’ll be well on your way to catching more fish on your jigs. And there’s never anything wrong with that ๐Ÿ™‚

Items used for this project:

Buzz Cut Skirts
Silicone Skirts
Finished Bass Jigs
Finished Finesse Jigs

If you enjoyed this post, please be sure to like it and share it with your friends.

And, as always, if you need any kind of lure-making supplies, be sure to visit our website, at http://lurepartsonline.com

Please share!

Spinnerbait and Buzzbait Mods to Catch More Fish

Spinnerbait and Buzzbait Mods to Catch More Fish

Spinnerbait and Buzzbait Mods to Catch More FishIt’s no secret that spinnerbaits and buzzbaits catch a ton of fish. Even cheap retail baits right out of the package can work really well.

The problem, though, is that everybody and their brother throw spinnerbaits and buzzbaits. This makes them very recognizable to the fish you’re trying to catch.

Picture this: You hit the local tackle shop or major retailer and buy yourself a handful of new lures.

While you’re there making your purchase, a half dozen other anglers are doing the same thing. They might not be there in the store when you are, but they will be at some point. And guess what. They’re buying the same exact lures you’re buying. And they’re throwing them on the same lake as you, targeting the same fish as you.

That’s a recipe for some tough fishing days, with everyone using the same lures.

So what can you do to fix this problem? It’s simple! Make your lure look and act differently than the rest of them. It’s not hard to do and it doesn’t cost much, either. Stick with us here and keep reading. By the time you’re finished, you have learned some spinnerbait and buzzbait mods to catch more fish ๐Ÿ™‚

So what can you to change the look of your spinnerbait, buzzbait or bladed jig? Well, the style of these baits is pretty much the same, no matter who makes them. It’s just part of their inherent design.

But the overall look of a bait can be changed drastically with a little tweaking and experimentation. This is where our little tips and tricks come in.

Take a look at the blades on your spinnerbait, buzzbait or bladed jig. For the most part, they’re usually pretty ordinary. Like we said, they all tend to look the same, no matter who makes them. Right?

Well, here’s where you can set yours apart and make them stand out in the crowd.

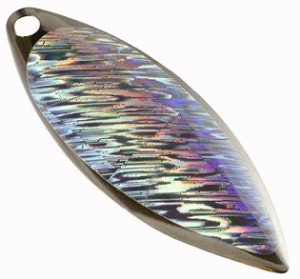
Show Stopper Willow Blade StickersThere are some pretty inexpensive products available that can turn your spinnerbait, buzzbait or bladed jig into a fish-catching machine, even on pressured lakes. And they only take a minute or two to install on your lures. And your lure is transformed instantly into a new one, with a completely different look.

OK… no more teasing you! Here’s the “secret sauce”, so to speak. It’s called lure tape.

What’s lure tape? It’s self-adhesive tape that has various types of reflective patterns on it. It excels at giving your bladed baits a new look, to set them apart from the crowd and give them new appeal. And it does that without having to buy another new lure.

Holographic Blade StickersLure tape can also be used to breathe new life into an old lure when the blades have become old and dull. Blades that are worn and don’t flash much anymore won’t attract as many fish. Lure tape is a great way to fix that too.

Another advantage with lure tape is that you can instantly change the appearance of a lure temporarily, based on conditions you happen to encounter on the water.

When conditions change, or if you hit another body of water, remove the sticker and revert right back to the look that the lure had prior to using the lure tape.

Lure tape can be bought in a myriad of colors. It can also be bought in pre-cut shapes, for specific blade shapes and sizes, or you can buy a roll of it and cut it to fit whatever you need it to fit! You can even buy a lure sticker assortment that has a bunch of different colors, sizes and shapes already cut for you. You just peel and stick them on.

You can also buy it in rolls of a specific color. This allows you to cut it at whatever length you need and then shape it to the lure you want to change the look of.

Oh, and don’t be mistaken and think that this will only work for blades on spinnerbaits. It can be used on crankbaits, bladed jigs, buzzbait blades and other lures too. Your imagination is the only limit when it comes to spinnerbait and buzzbaits mods to catch more fish.

So check out the video below. It will give you some cool ideas as to how lure stickers can be used to spruce up a lure or change the look of it completely. Enjoy!

Items used for this project:

Prism Tape Rolls
Blade Stickers
Dancer Jig Blade Stickers
Holographic Lure Stickers
Sonar Bait Stickers
Holographic Disco Tape

If you enjoyed this post, please be sure to like it and share it with your friends.

And, as always, if you need any kind of lure-making supplies, be sure to visit our website, at http://lurepartsonline.com
Please share!

How To Make a Topwater Bass Popper

How To Make a Topwater Bass Popper

How To Make a Topwater Bass PopperWant to learn how to make a topwater bass popper? We have a great tutorial video for you right here.

The topwater bass popper has been around for a very long time. This type of topwater lure has caught countless numbers of bass over the decades. It’s safe to say that it’s probably one of the most popular topwater lures for catching bass with, no matter what part of the world you’re located in.

This tutorial will show you how to make a topwater bass popper, step by step.

Let’s get started!

The first thing you’ll need is a piece of wood material that will be used to make the actual popper lure body. The video suggests using a wood dowel. China hardwood is recommend for its ease in carving, vs. oak.

The first step will be to cut the dowel rod into pieces that are 2 7/8 or 3 inches inches in length, whichever you prefer. And once you’ve cut your pieces to the desired length, grab the one that you’ll be using to make a your first popper.

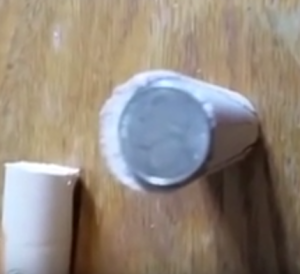
Place a nickel on top of dowel rodStand the piece upright and place a nickel on the top end, offset so that the nickel touches one side of the circumference, but not the other.

Once you’ve done this, trace around the outside of the nickel with a pencil. This outline will give you a pattern for the front of the popper.

Next, you’ll trace out the tail end of the popper, using a pencil eraser. Move the edge of the pencil eraser to the outside edge of the wood dowel, being sure to line it up with the marks that were created on the other end, using the nickel.

Lines will then need to be drawn down the length of the dowel to create the outline that will be used to shape the body into a popper shape. Material inside of this outline will not be carved away. This also defines the bottom of the lure, where screw eyes will be added, to hold the hooks later on.

Time to start carving our popper lure bodyNow we’ll start the actual carving, using a utility knife, or something similar.

Start by carving from the top of the lure (the large end), toward the bottom end. Remove small amounts of material at a time. This prevents mistakes that will be irreversible.

Once the top end of the popper is carved, it’s time to move down and carve the smaller end, for the tail of the lure.

Carving doesn’t have to be precise if you don’t want it to be. Your goal is to obtain the basic shape of the popper. You don’t need to be concerned with creating a perfectly smooth surface if you don’t want to.

If you choose to forego sanding and perfecting of the lure’s surface, the next step will be to form the mouth of the popper, which will allow it to pop and gurgle when the bait is twitched or “popped” on the surface.

This part of the project is accomplished with a Dremel, using a small sanding tip. The idea here is to create an angled shape on the front of the lure. Once the initial angle is created, the face of the popper can then be hollowed out, to create a concave surface.

Once the face of the lure is shaped to your satisfaction, it’s time to give your lure some personality, with paint!

In the video tutorial, the luremaker suggests using Sharpie or other permanent markers to create the color pattern you want. While this is OK to do, it doesn’t give the lure a finished look, the way paint would. But it’s ultimately up to you to decide if you want it to look great, or just catch fish ๐Ÿ™‚

Once the color is applied, whether it’s been painted or colored with Sharpie markers, it’s time to add the screw eyes. You’ll need 3 screw eyes total. One is for the rear hook, one for the center hook and one on the front of the lure, which will be your line tie.

When placing the screw eyes on the bottom of the lure, be sure to place them far enough apart to prevent the hooks from catching on each other!

After placing the screw eyes, it’s time to seal the lure, to prevent water from getting into the wood body and ruining your lure. The luremaker uses good old urethane, but we recommend using an epoxy topcoat, for the sake of durability.

The video explains the remaining few steps left to finish your lure, including good info on what treble hooks to use.

We hope you’ve enjoyed learning how to make a topwater bass popper. Have fun making your new poppers and enjoy catching bass on them!

Here’s the video tutorial.

If you prefer to use a wood popper body that’s already been shaped for you, click here.

Items used for this project:

Wood Popper Bodies (in case you donโ€™t want to carve your own)
Lure Eyes
Split Rings
Round Bend Treble Hooks
Screw Eyes
Epoxy Top Coat
Quick Coat Permanent Lure Markers

If you enjoyed this post, please be sure to like it and share it with your friends.

And, as always, if you need any kind of lure-making supplies, be sure to visit our website, at http://lurepartsonline.com

Please share!

How to Vacuum Form Stencils for Painting Crankbaits

How to Vacuum Form Stencils for Painting Crankbaits

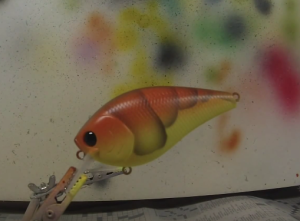
Finished Craw pattern made with vacuum stencilToday’s tutorial will be teaching you how to vacuum form stencils for painting crankbaits.

Learning to do this will help you create duplicate patterns on multiple crankbaits very easily. This eliminates trial and error and allows you to paint many crankbaits with the exact same markings on them.

Lets get started!

How to Vacuum Form Stencils for Painting CrankbaitsThe first thing you’ll need to do is choose a crankbait style that you want to create a stencil for. Start off with a crankbait blank that’s unpainted. Know ahead of time that you’re basically sacrificing this body, since you’ll be cutting it in half!

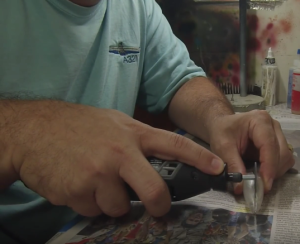
Use a Dremel or other tool to cut the bait in half. Be careful not to hurt yourself with the tool you’re using.

If you use a power tool to do the cutting, such as the Dremel, be sure to wear safety glasses or goggles. This will protect your eyes from any small pieces that might fly during the cutting process. When you’re done cutting, use a small screwdriver or other flat tool to pop the two lure halves apart.

Once the bait is cut in half, it’s time to start creating your vacuum formed stencil.

Now it’s time to lay your lure halves on the vacuum form box. You can easily make your own vacuum box out of wood and a shop vac. Use pegboard or any other thin wood veneer (with holes drilled in it) as the top surface.

Next, you’ll need some thin plastic stencil material that you’ll lay on the vacuum board, over the lure body pieces.

Vacuum Formed StencilsThe stencil material is heated with a heat gun, to get it warm and flexible. As it becomes soft and flexible, it gets laid onto the surface of the vacuum board. This allows the vacuum to draw the material down tight to the surface of the board, and to the surfaces of the lure bodies.

Once the stencil material is properly formed to the lure bodies, the heat gun and the vacuum are turned off. Then the stencil material is allowed to cool a bit. Once it’s cooled sufficiently, the lure body halves can be popped from the hardened stencil material.

Once the stencils are formed, it’s now time to cut them out in whatever pattern you want them to be used to paint onto your lures.

For the rest of the steps, be sure to watch the video below. Michael Orensteen walks you through the rest of the process, step by step.

Items used for this project:

Airbrush
Lure Paint
Unpainted Crankbait Body
Stick-on Lure Eyes
Treble Hooks
Split Rings
Oval Line Tie
Stencil Material

If you enjoyed this post, please be sure to like it and share it with your friends.

And, as always, if you need any kind of lure-making supplies, be sure to visit our website, at http://lurepartsonline.com

To check out the Lure Me In Custom Painted Crankbaits Youtube channel, Click Here

Please share!

How to Paint a Natural Perch Pattern Crankbait

How to Paint a Natural Perch Pattern Crankbait

How to Paint a Natural Perch Pattern CrankbaitIn our last blog post we showed you how to paint the Tiger Perch pattern. For this post, we’ll be showing you how to paint a natural perch pattern crankbait. Custom lure painter Michael Orensteen will be your instructor for today ๐Ÿ™‚

It’s no secret that natural patterns on crankbaits catch fish like crazy. Natural-looking baits are more apt to get bites on pressured lakes where bass and other gamefish see a lot of lures. So with today’s tutorial you’ll be able to airbrush a natural perch pattern on your crankbait and make it look completely natural.

Michael says that the natural perch is one of his favorite patterns to paint. If it’s done properly, it’s quite easy to do, so let’s get started!

Unpainted Crankbait BodyThe first thing you’ll need to do is pick an unpainted crankbait body to paint. Once you’ve chosen the lure body, you’ll need to spray a white base coat on the body, as is done most of the time.
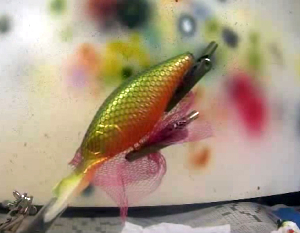
Once the white has been sprayed, the next step will be to apply a coat of pearl white. Using the pearl white gives the bait a slight glimmer, which helps to mimic the natural, subtle sheen that fish scales have underwater. Pearl will also help give the paint more depth.

In between paint layers, always be sure to heat set the paint with a hair dryer. It only takes a few seconds to do and helps to make sure that the paint dries thoroughly before another layer is applied.

Next, the top half of the bait is painted with a coat of pearlized lime green. Michael mentions that it’s always a good idea to shake this color up really good before using it, to be sure that the pearl is mixed well. It might even be necessary to thin it out a tiny bit to help the pearl flakes flow better through the airbrush.

Once the pearl lime has been sprayed onto the top half of the lure blank, the belly will be sprayed with a layer of transparent orange. Mike explains, during this part of the process, that he always prefers to spray a couple of light coats of paint rather than one heavy coat, regardless of what color he might be using.

And, again, don’t forget to heat set each layer of paint!

After spraying the second coat of orange on the belly, another shade of green is layered onto the back of the lure. This one is called Moss Green. As this layer is applied, you can really see the overall color pattern starting to take shape!

lure blank with scale netting applied

The next step will be to add scales to the bait, using scale netting. Be sure to have something available to hold the scale netting in place while you spray the paint on. Michael suggests using small alligator clips.

The scale pattern should be very light and not too strong, so the black paint used to spray the scales should be thinned out with paint reducer so that the black isn’t too dominant. It should be just enough to show the scale pattern. Keep in mind that the scale pattern should be sprayed only on the top section of the lure, not all the way down the sides.

After drying the scales with the hair dryer, the scale netting is removed and the scales become readily visible.

And now it’s time for the stripes, to make it look like a Perch.

As with the scales, the stripes should be subtle, so the pressure for the airbrush should be adjusted down to 12-15 PSI. This allows you to spray a light dusting of paint and create subtle vertical stripes on the sides of the lure.

Michael uses a comb as a mask to create the stripes. As always, he seems to find items that are common around the house to help produce the desired look and results. Watching him paint these lines using a comb is impressive, as he pulls the comb away and the stripes look natural.

Black is then sprayed along the back of the lure to darken it up a bit, helping to blend the stripes into the back of the lure. A little black is also sprayed around the eyes and on the nose.

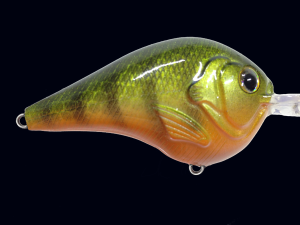
finished natural perch pattern crankbaitAnd the final painting step is to spray some white under the throat of the bait. This helps to give a little contrast with the other colors and make the lure look more natural, since most fish have white on their bellies.

The final steps for this project are to add your stick-on eyes and then your clear coat.

And that’s it! Let the lure dry thoroughly, for a minimum of 6-8 hours, add your hooks, split rings and line tie and go catch some fish!

Watch the video below.

Items used for this project:

Airbrush
Lure Paint
Unpainted Crankbait Body
Stick-on Lure Eyes
Treble Hooks
Split Rings
Oval Line Tie

If you enjoyed this post, please be sure to like it and share it with your friends.

And, as always, if you need any kind of lure-making supplies, be sure to visit our website, at http://lurepartsonline.com

To check out the Lure Me In Custom Painted Crankbaits Youtube channel, Click Here

Please share!